
This documentation includes detailed guidance on setting up a permanent access token, adding your phone number ID, and configuring the verify token required for webhook validation. Additionally, you can customize the button text and messages for different events and understand the rules for creating approved message templates. By following this guide, you can establish a fully functional WhatsApp communication system for handling customer orders efficiently.
What’s App Setting Page
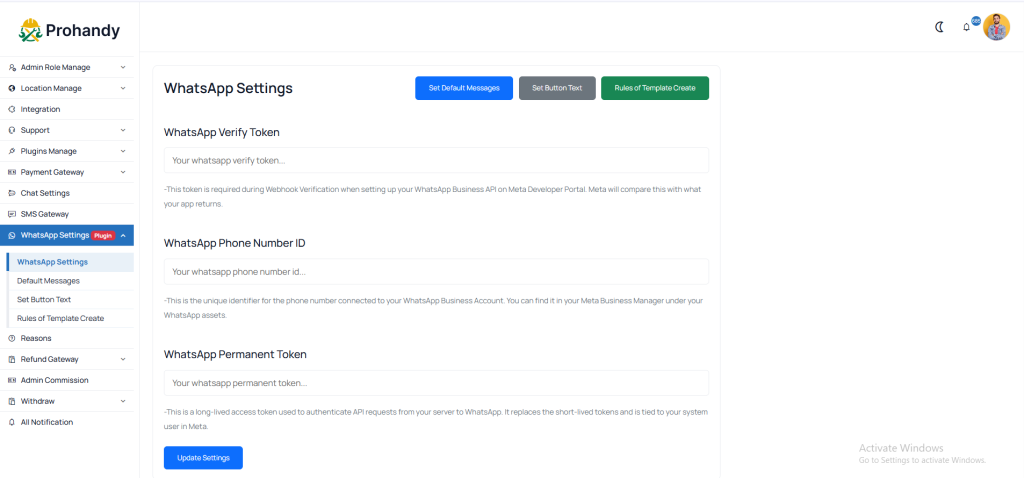
This page is essential for enabling What’s App Intregation:
01. WhatsApp Verify Token : This token is required during Webhook Verification when setting up your WhatsApp Business API on Meta Developer Portal.This Verify Token is generated automatically when you add plugin.
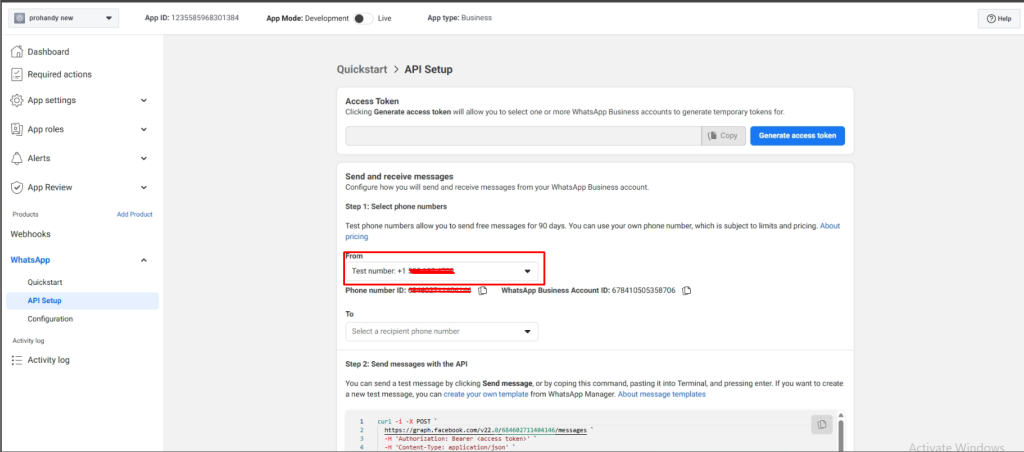
02. WhatsApp phone number id : This is the unique identifier for the phone number connected to your WhatsApp Business Account. To find your WhatsApp Phone Number ID, go to https://developers.facebook.com/apps and create your app. Then select your app ,click WhatsApp -> Set Up. In the left sidebar, click WhatsApp ->API Setup. Under “Send and receive messages” section,choose your phone number from the “From” dropdown. Once selected, the Phone Number ID will appear just below, along with the WhatsApp Business Account ID.
03. WhatsApp Permanent Token : This is a long-lived access token used to authenticate API requests from your server to WhatsApp. It replaces the short-lived tokens and is tied to your system user in Meta.To generate a permanent access token for WhatsApp Cloud API:
- First go to https://business.facebook.com/settings and navigate to Users → System Users from the left sidebar.
- Click Add, give your system user a name (e.g., “WhatsApp API User”), and select Admin access.
- Once created, select the system user and click Add Assets to assign your WhatsApp Business Account with full control.
- Next, click Generate Token, choose your app, and check the permissions
whatsapp_business_managementandwhatsapp_business_messaging. Finally, click Generate Token—a permanent access token will be shown.
04. After fill up this from ,click Update Settings for saving.
Default Message Setting Page
In this section, clients can define and customize the messages sent for specific events, such as: order confirmation, no available slots, search service, service not found etc…… and can see preview how the message will look before saving. After configuring all messages, click the ‘Save All Messages‘ button to apply and store your changes.
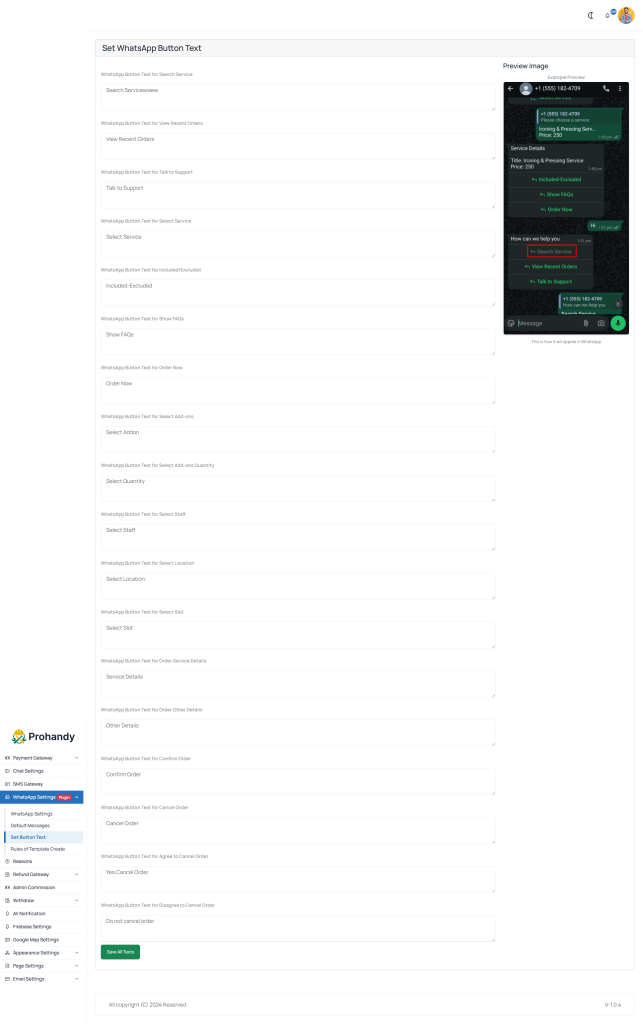
Button Text Setting Page
In this section, clients can define and customize the button text for specific events, such as: search service, view recent order details, talk to support, order now ,select staff, select location etc…… and can see preview how the button text will look before saving. After configuring all button texts, click the ‘Save All Texts’ button to apply and store your changes.
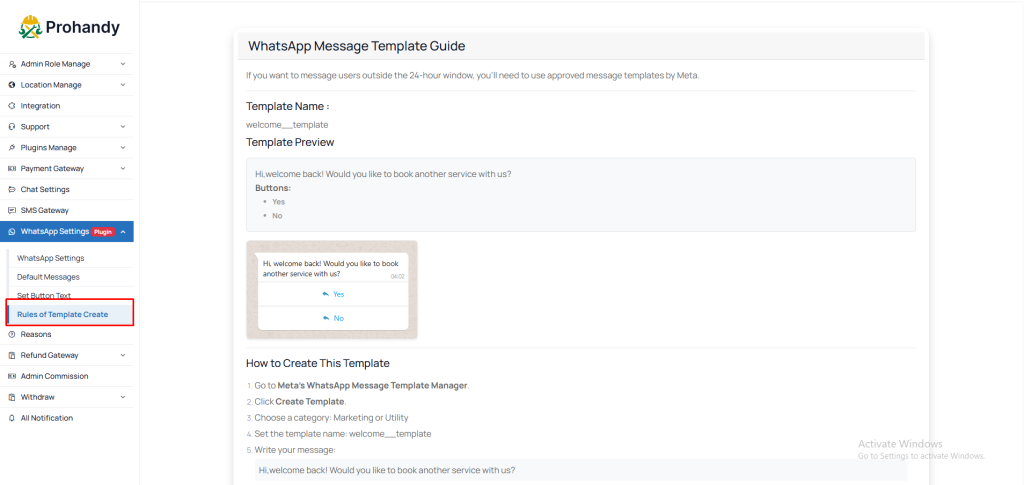
Rules of Template Create Page
If you want to send messages to users outside WhatsApp’s 24-hour customer service window, you must use pre-approved message templates by Meta (WhatsApp).In this section, you can learn how to create message templates correctly. Only approved templates can be used for messaging users beyond 24 hours from their last message.