

01. Search for “google cloud console”
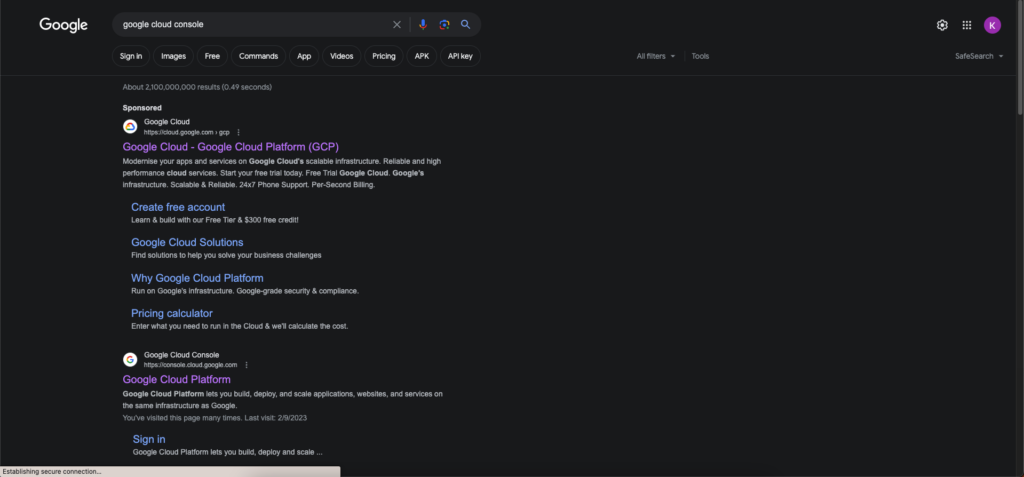
02. Click the first result
03. Login to your account if needed
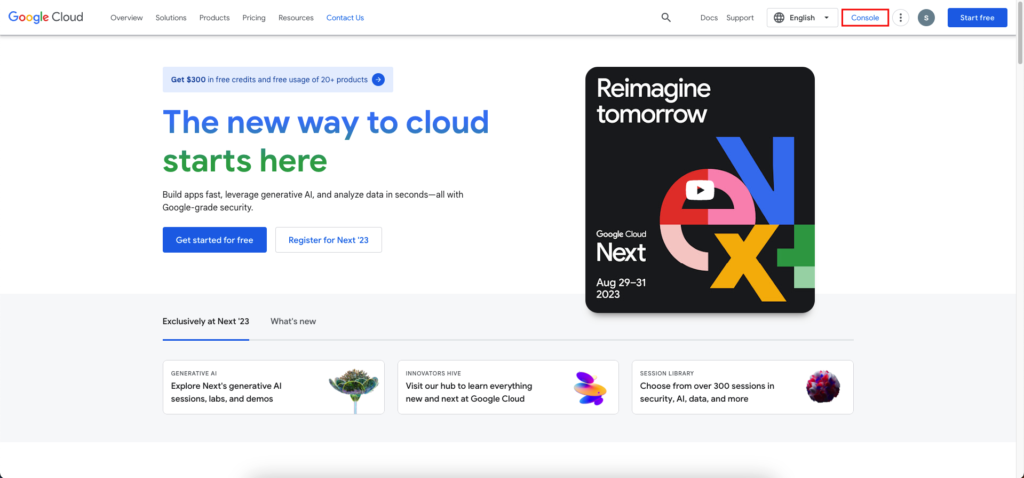
04. Click on the “Console” button on the top-right corner
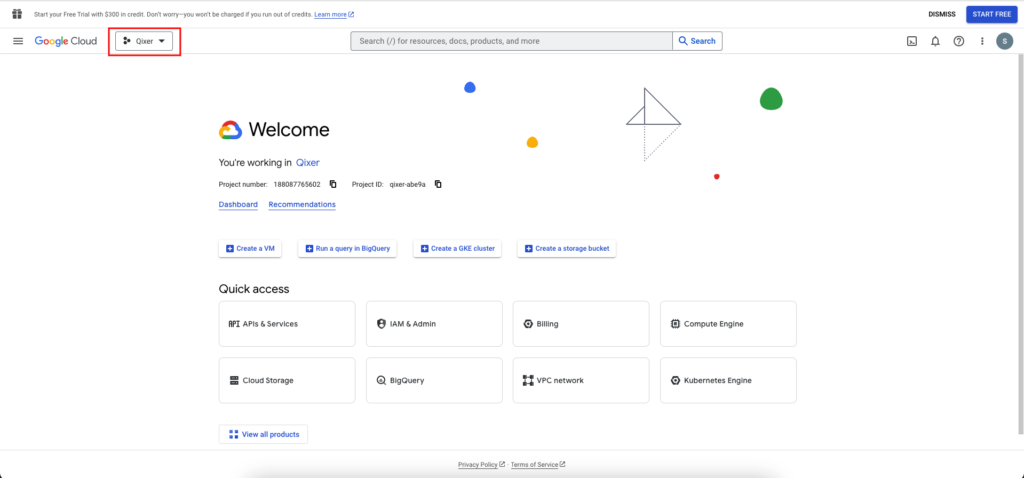
05. Select your project from the top-left corner dropdown
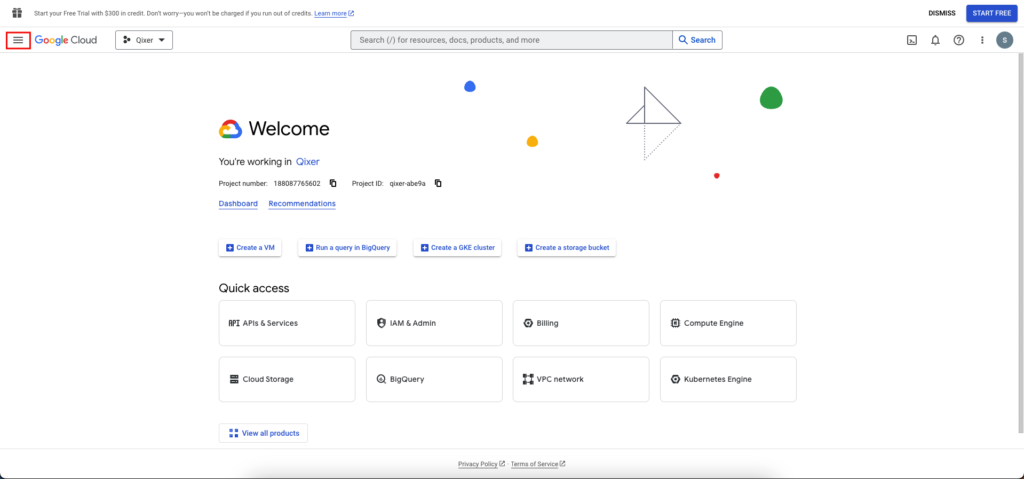
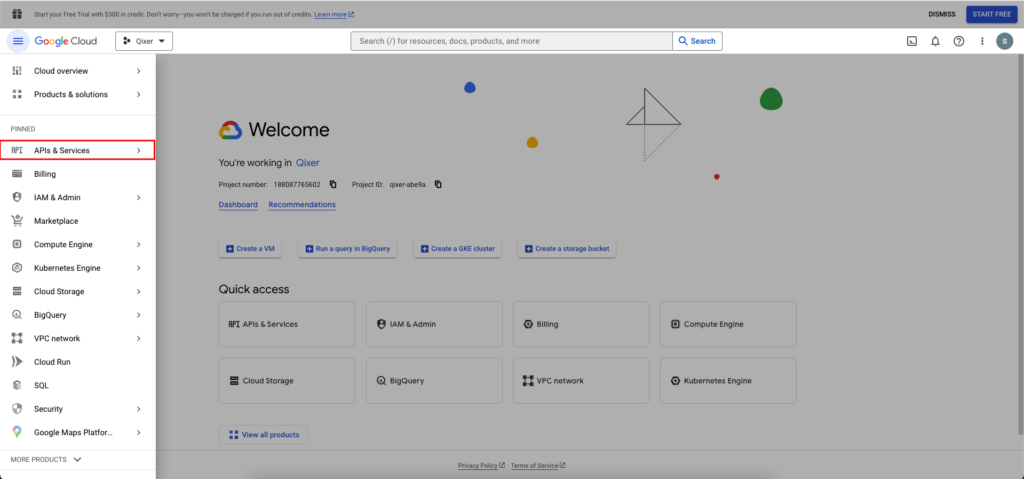
06. Click the option icon and at the top-left corner
07. Click the “APIs and services” option
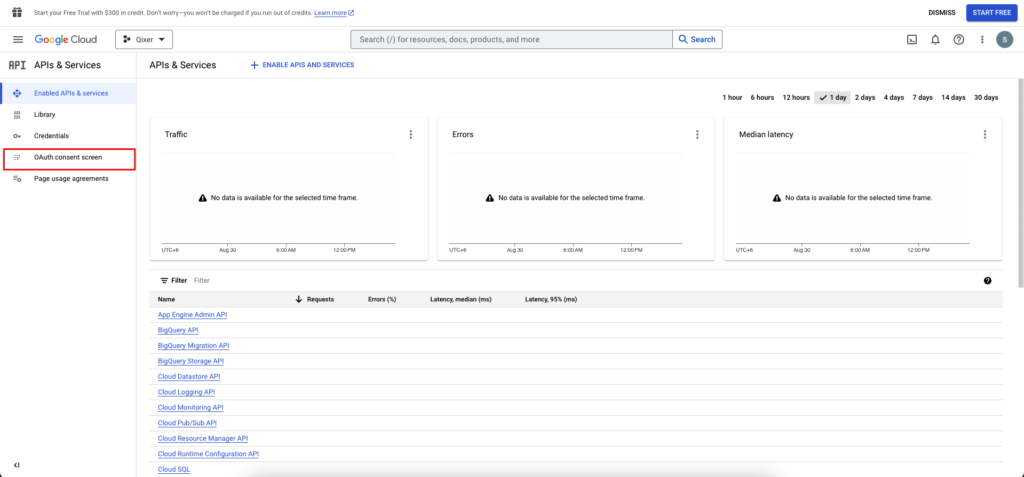
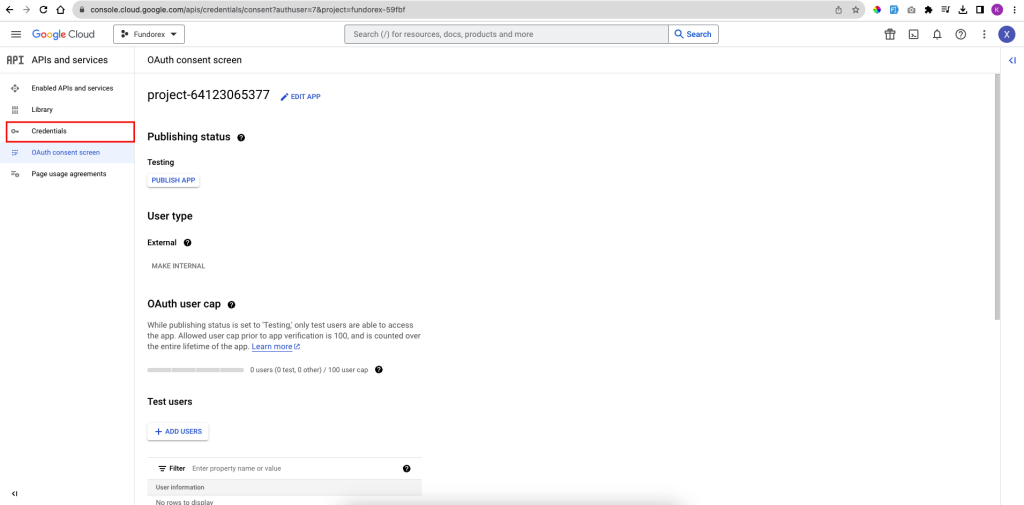
08. Click on the “OAuth consent screen” option from the left panel
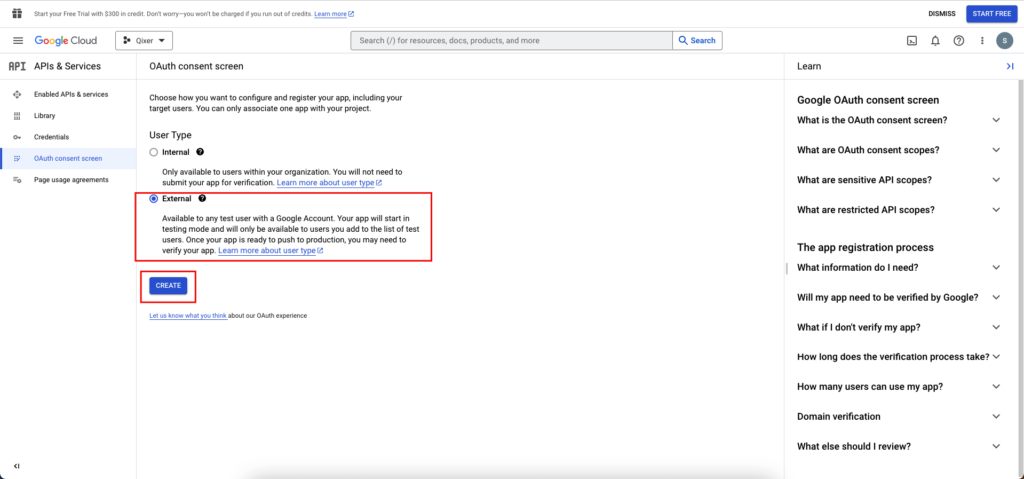
09. Chose “External” and click “Create”
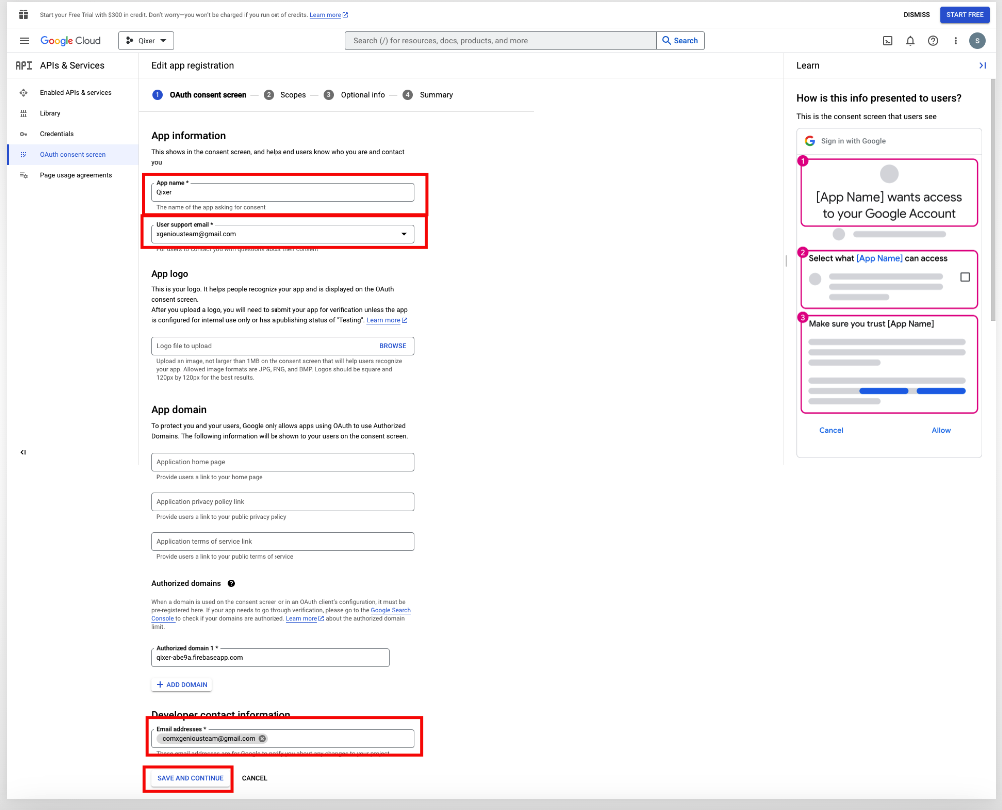
10. Provide the necessary informations and click “SAVE AND CONTINUE” for the next two steps and click “BACK TO DASHBOARD” for the last step
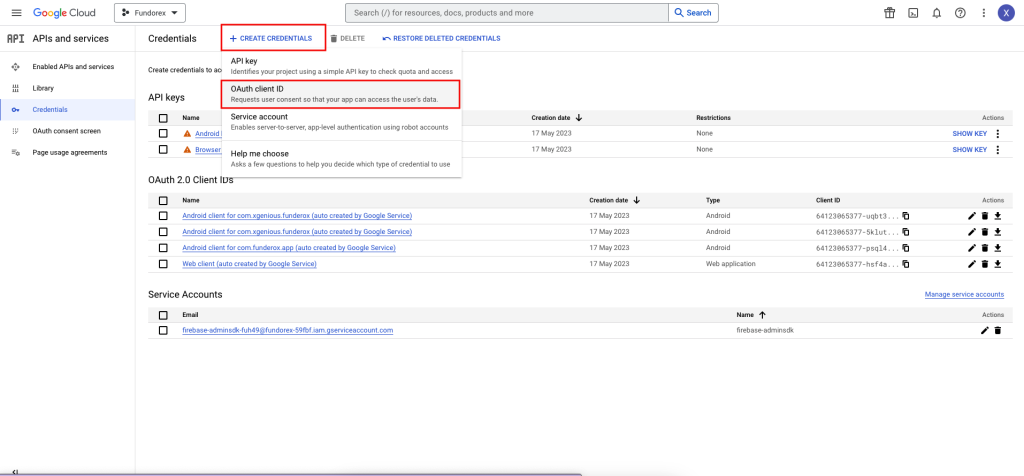
11. Now click on “Credentials“
12. Click on “CREATE CREDENTIALS” then “OAuth client ID“
13. Select Android from the dropdown option and provide the necessary info. Then click “CREATE“
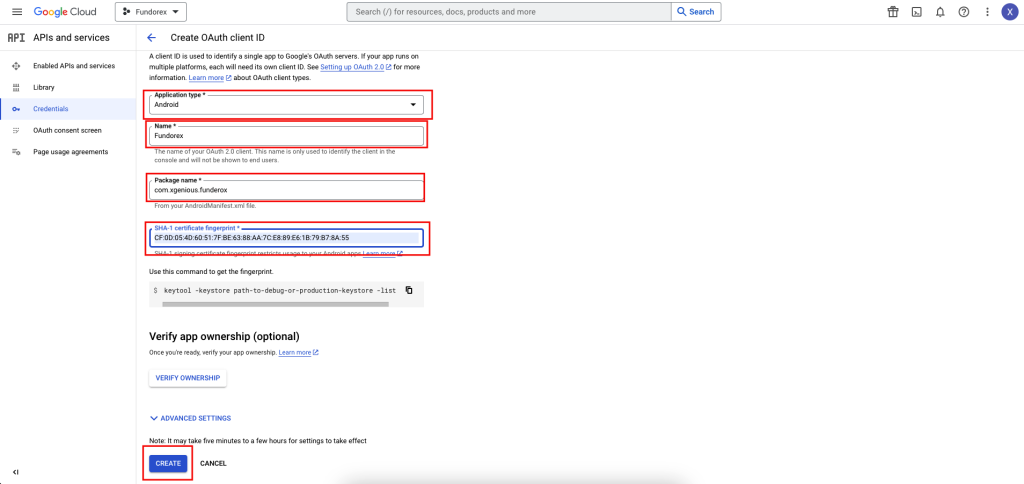
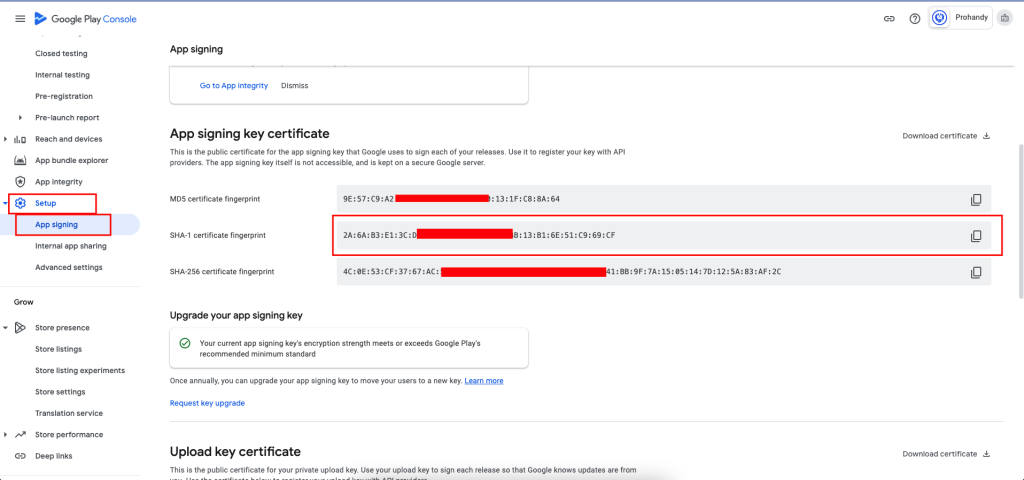
14. Sometimes creating credentials with release SHA-1 will not able to Sign-In in app debug mode. So Try building the app and then try Google Sign-in. If you are using App signing key certificate from google play store then also create a OAuth using Sha-1 key from Play store.
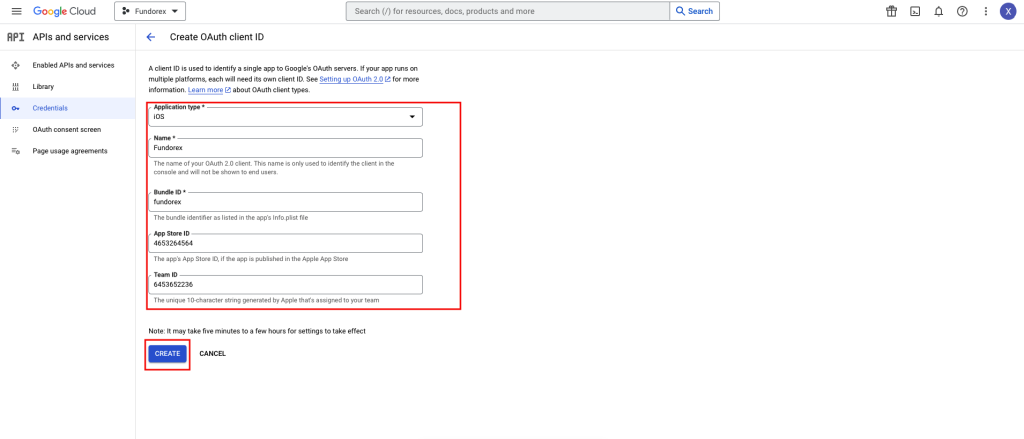
15. Next steps for IOS.
16. Create another “OAuth client ID“. This time Select “IOS” and provide the necessary info and Click “CREATE“.
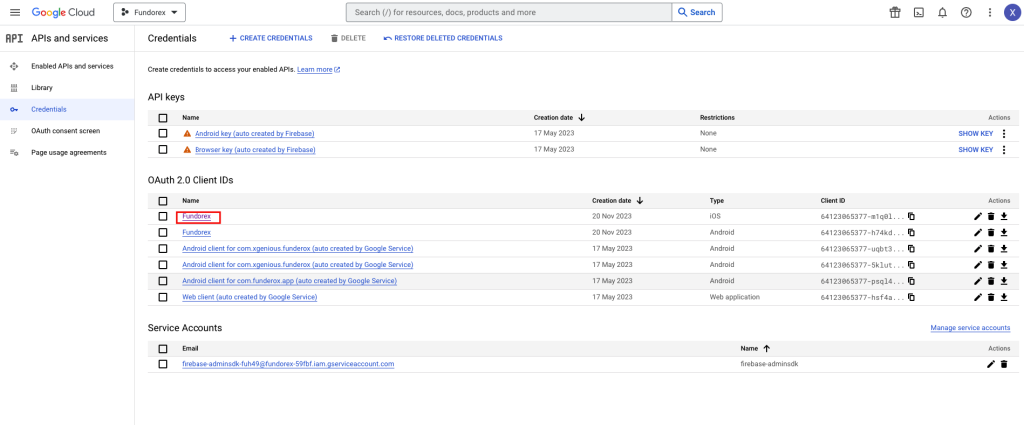
17. In the Google cloud console, click on the OAuth credential you created for your ios app
18. Only copy this first section
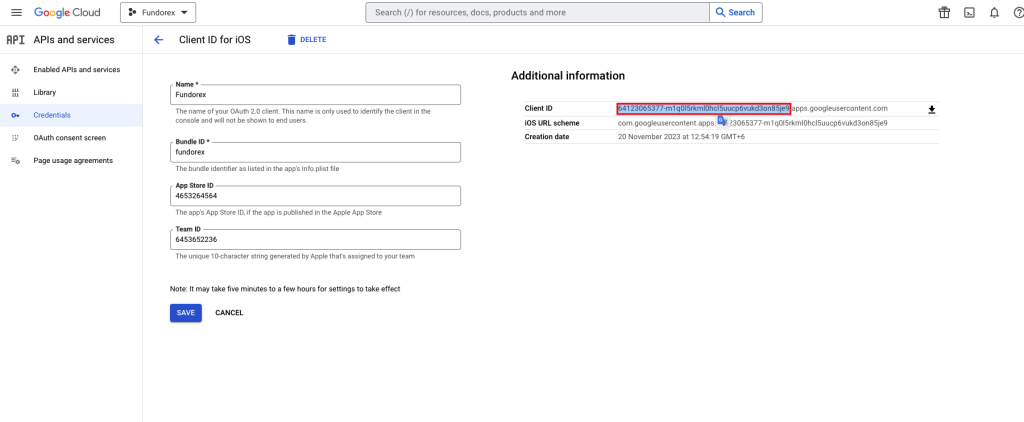
19. Open project/ios/Runner/Info.plist in any editor, Search for “google-reversed-client-Id-for-SignIn” and replace with the copied id from step 18

24. Run your app and it should be working with Google Sign-In now.