Prohandy – Marketplace
Prohandy is a better way to present your modern business. It’s easy to customize and also well documented. it also compatible with Desktop, laptop, mobile and also compatible with major browsers.
Update Process
Step 01:
Login to your cpanel or any panel you have, go to file manager and go to the folder where you install the script.
Step 02:
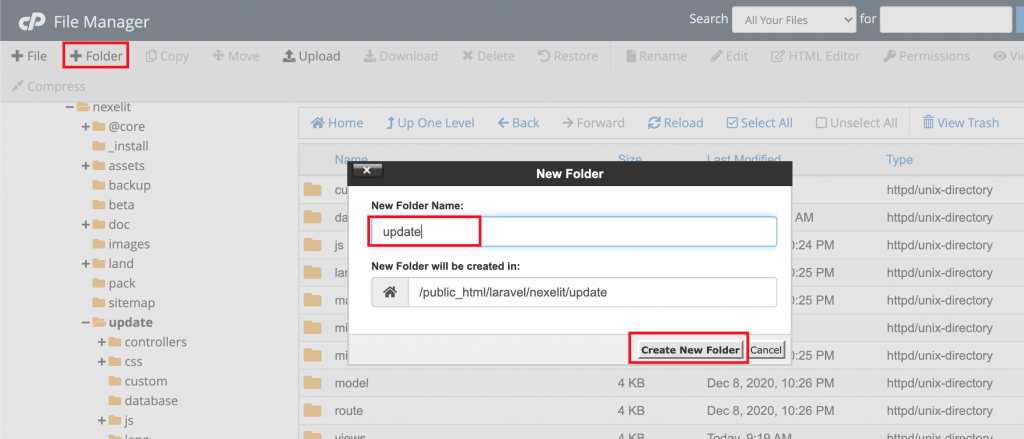
now create a folder name update
Step 03:
upload nexelit update file you will get it from codecanyon.

in your download folder you will find a folder name is update, inside this folder you will find a zip file, upload this file server inside update folder
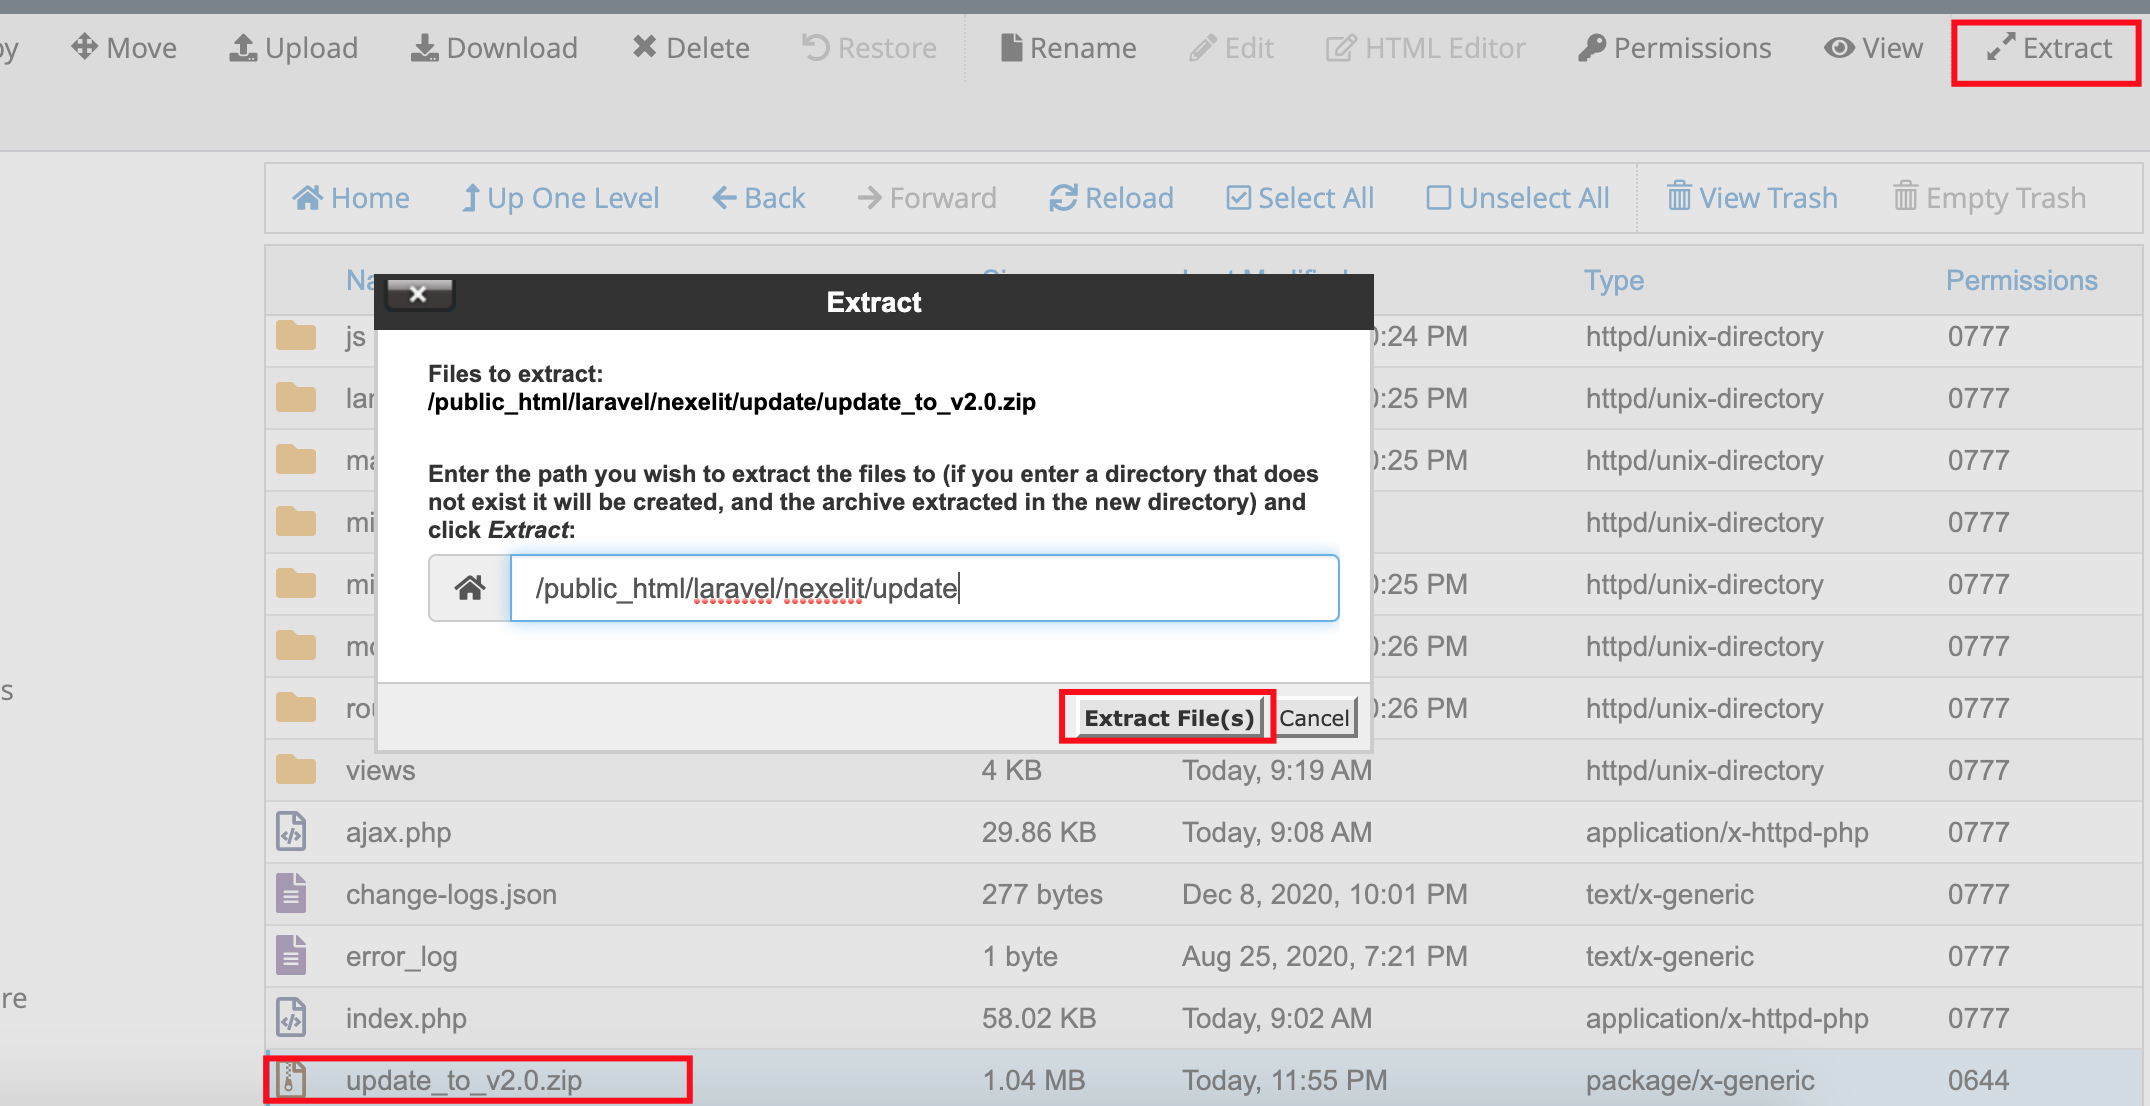
Step 04:
skip this step if you does not have any extra update folder inside update folder
move all file from update folder of inside update folder.
Step 05:
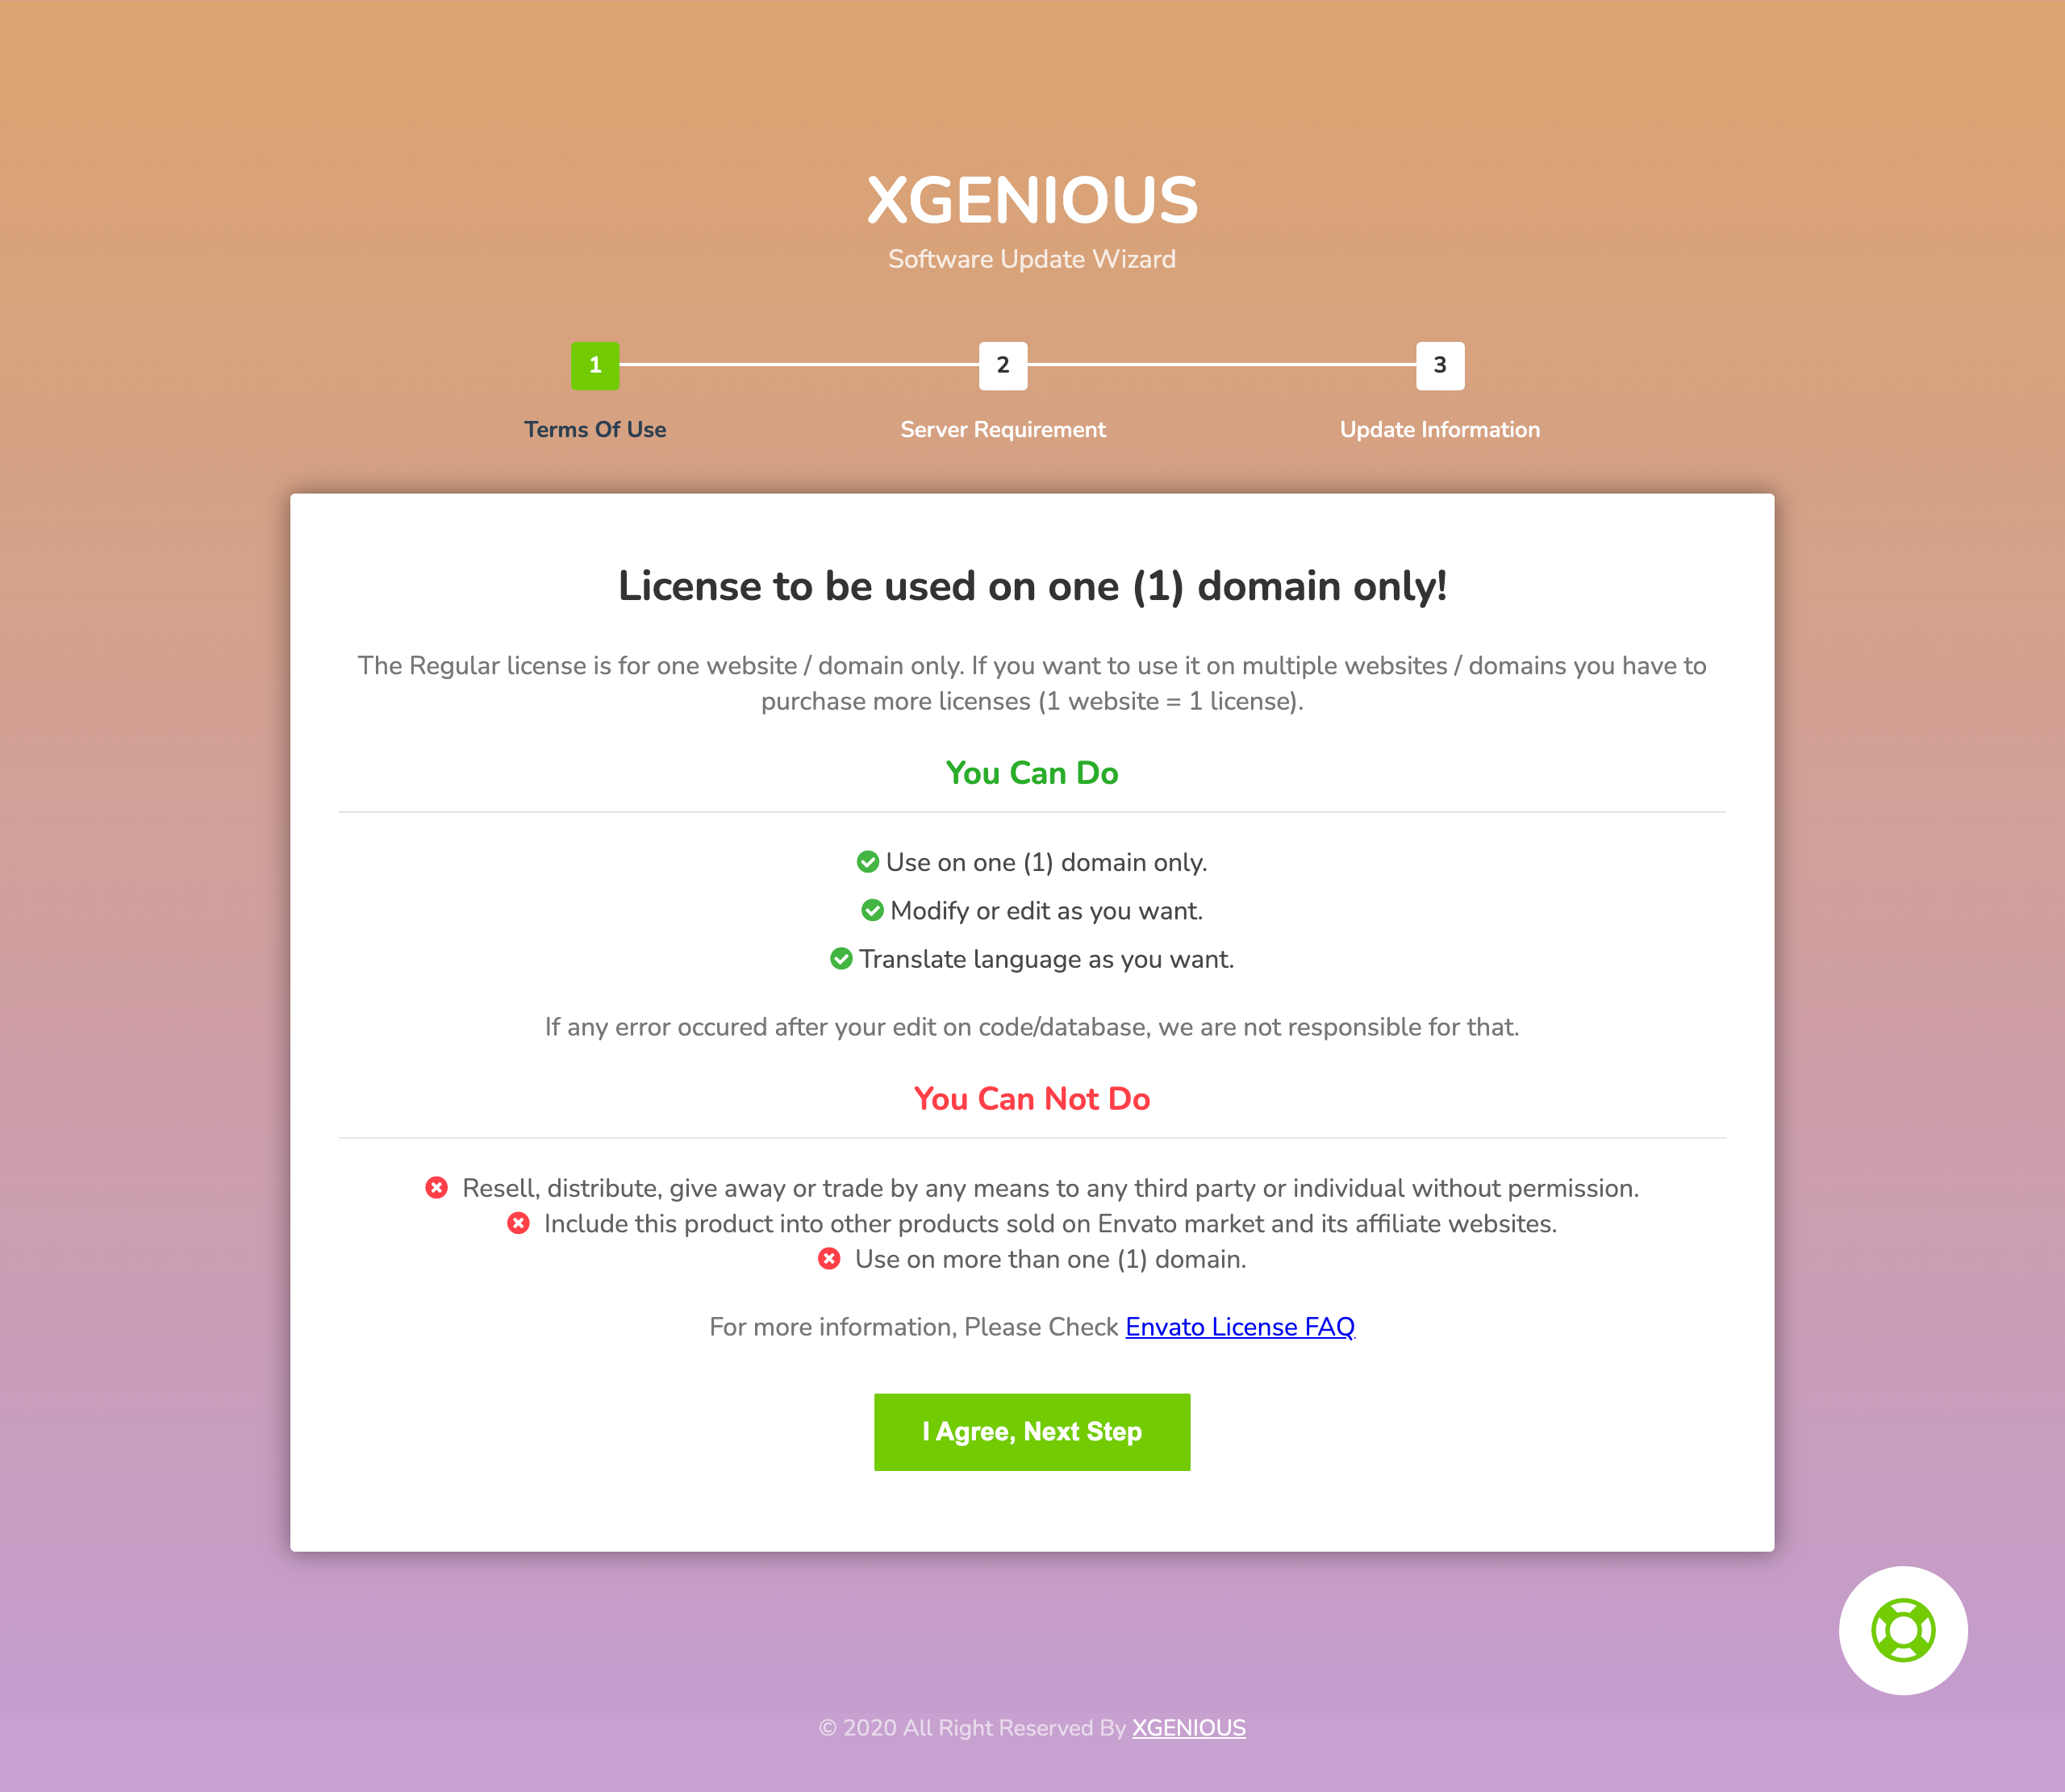
now go to your domain.com/update url and hit enter to see update wizard, update wizard will be like below picture.
Step 06:
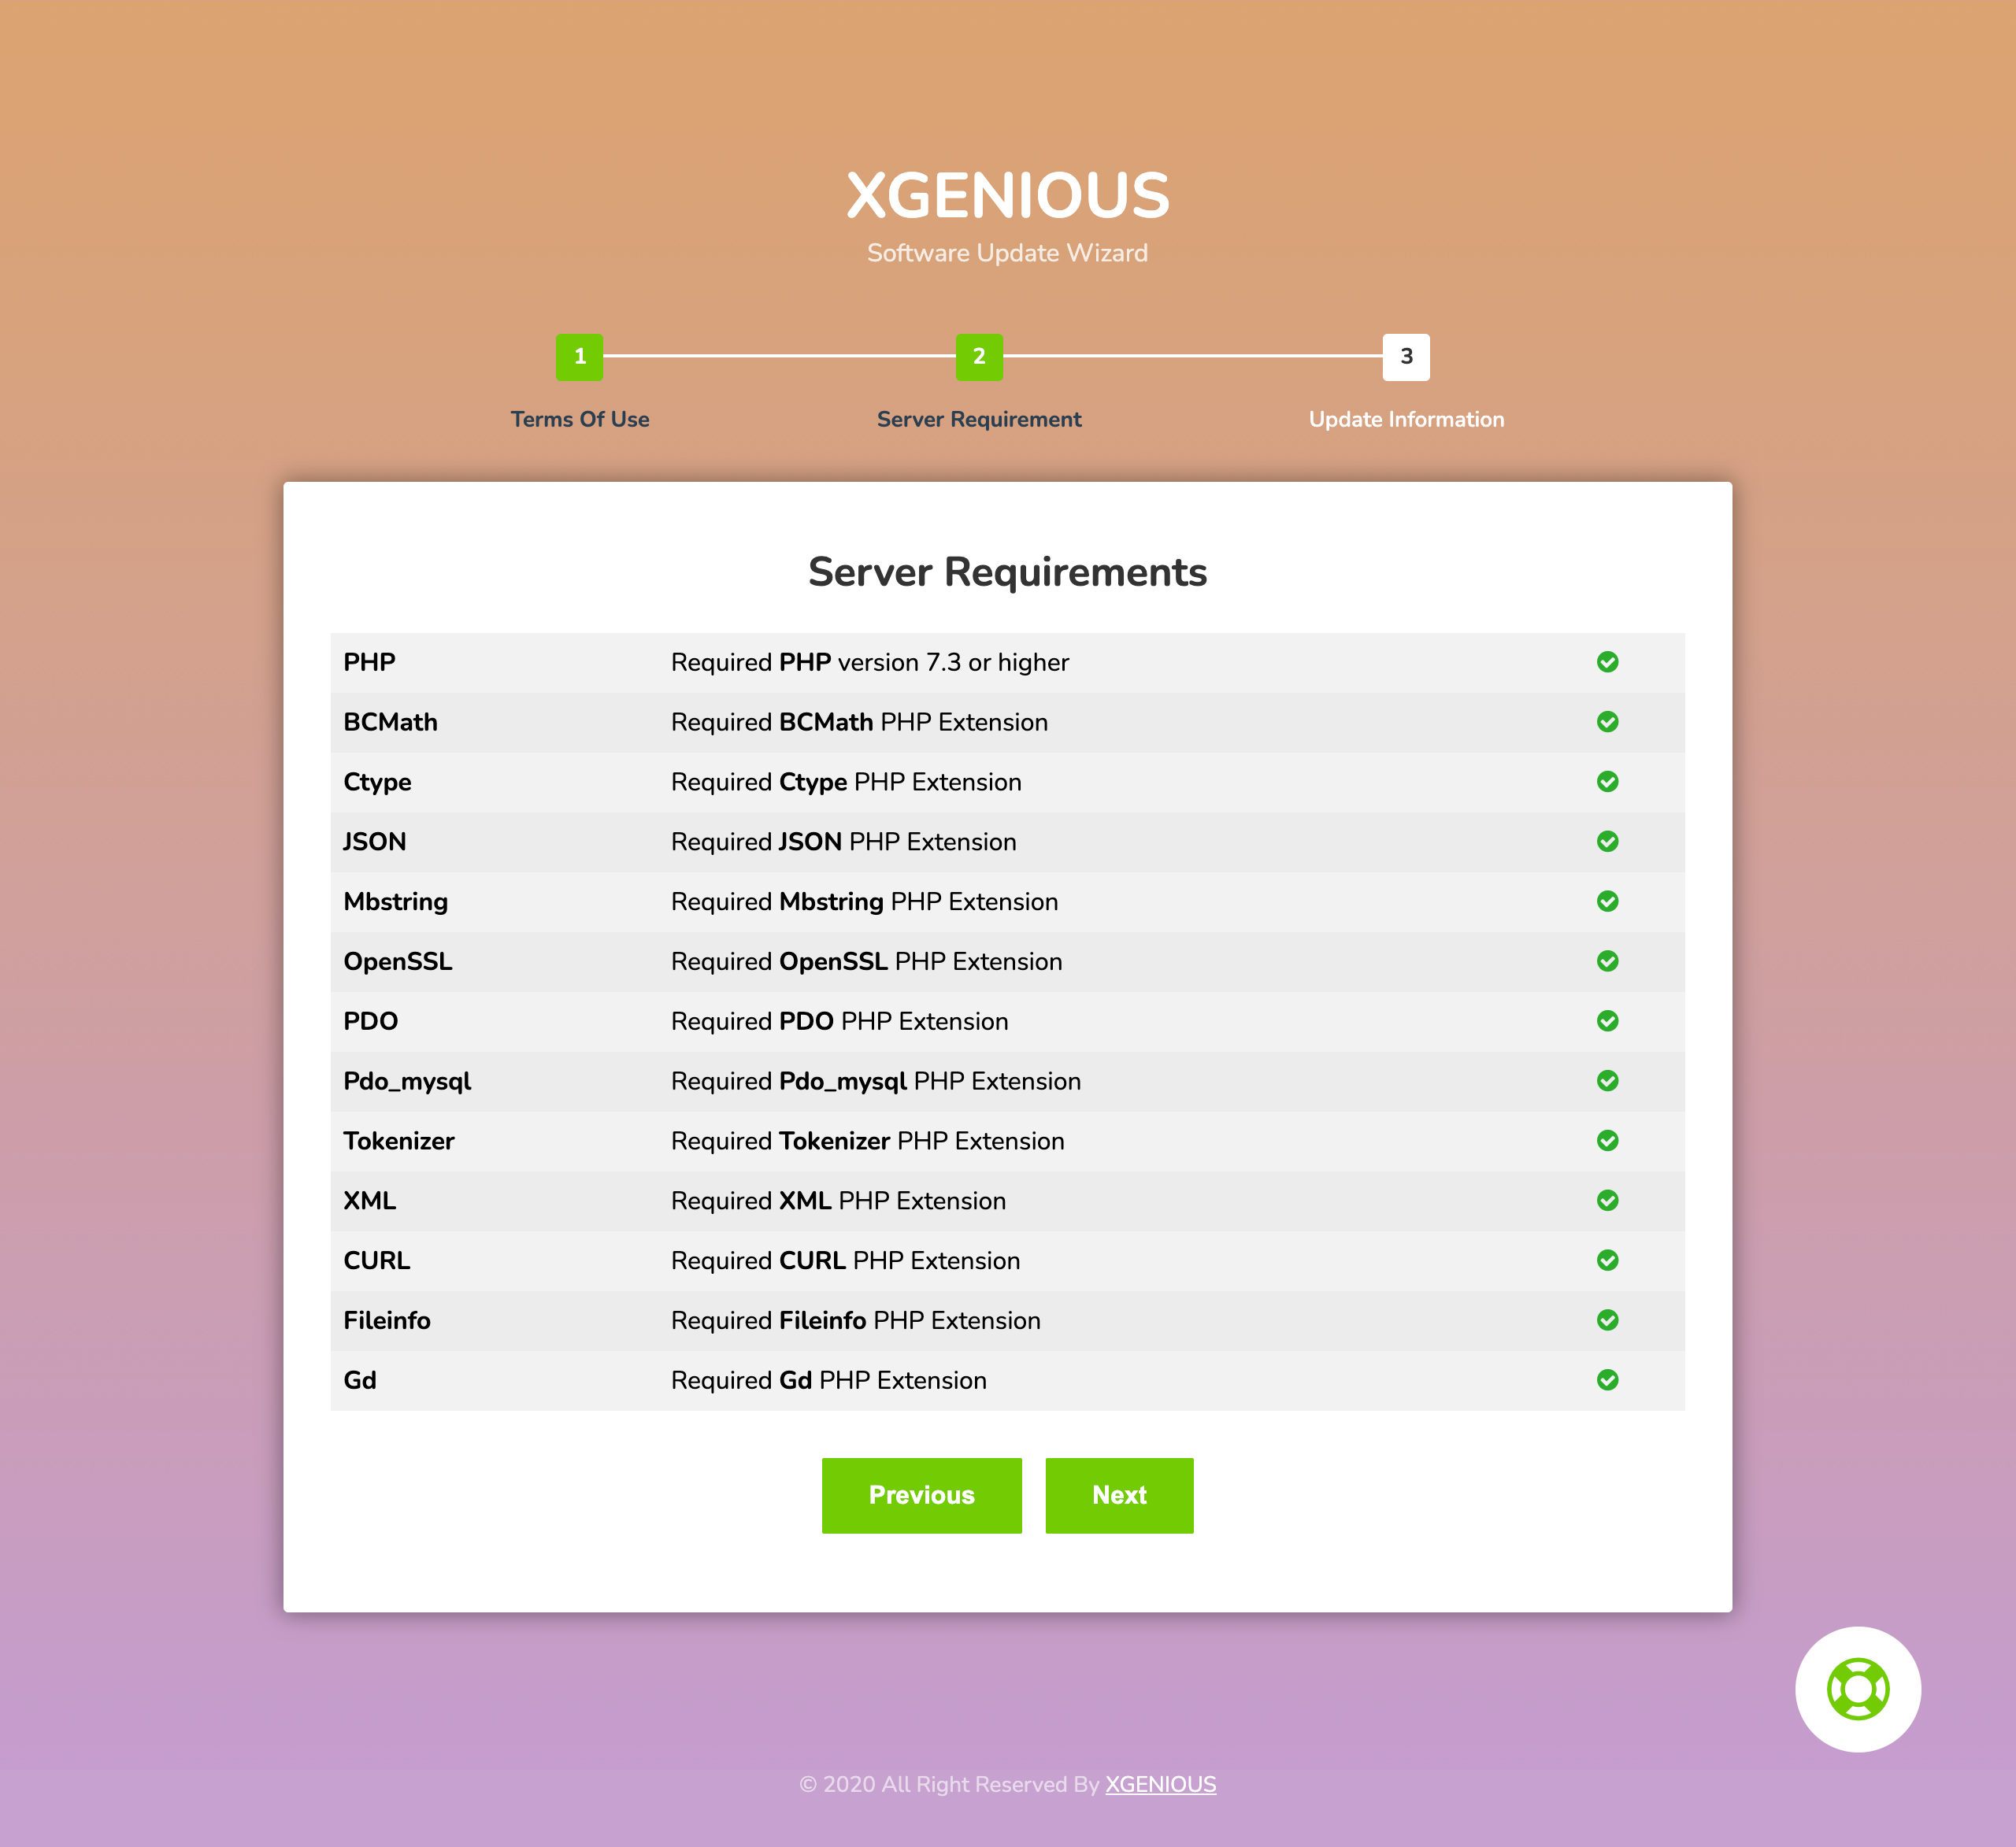
click on “i agree next step” and then see all permission is ok or not. if all are green check mark click on “next” button.
Step 07:
now you will find option to put your database host name, username and password.
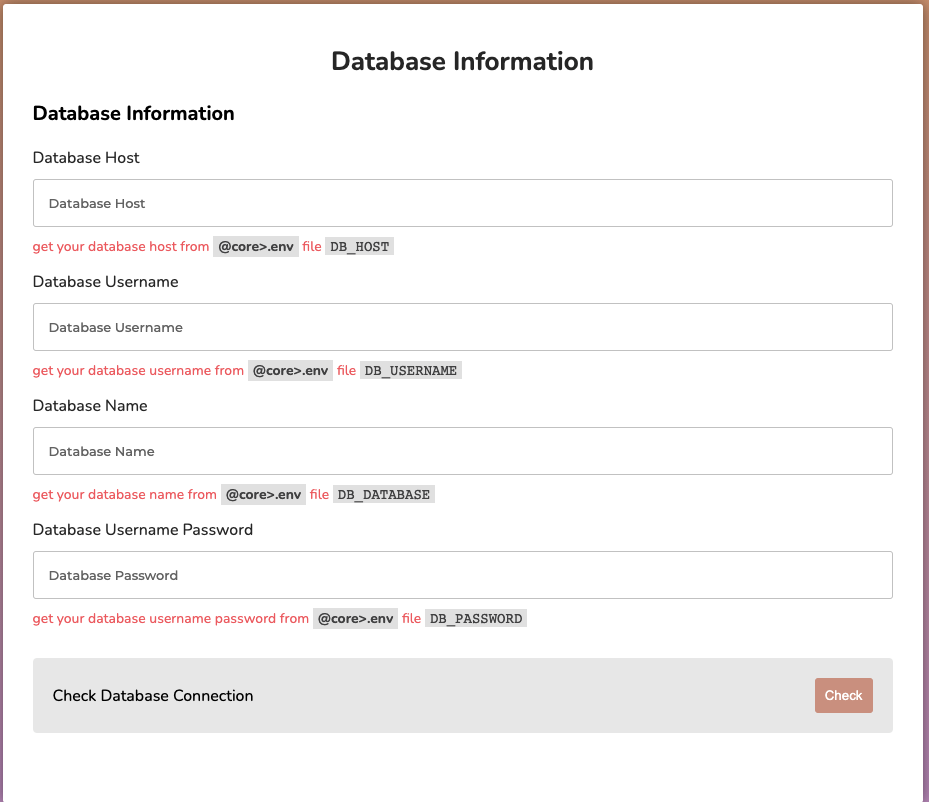
Step 08: click on “check” database connection button, if you all database info is correct you will see option to update file as like below.
if you database info is wrong, or password filed is empty (by default all field should have been filed automatically).
if it happened with you check your script database details from “@core>.env” file.
Step 09:
click on all update file one by one
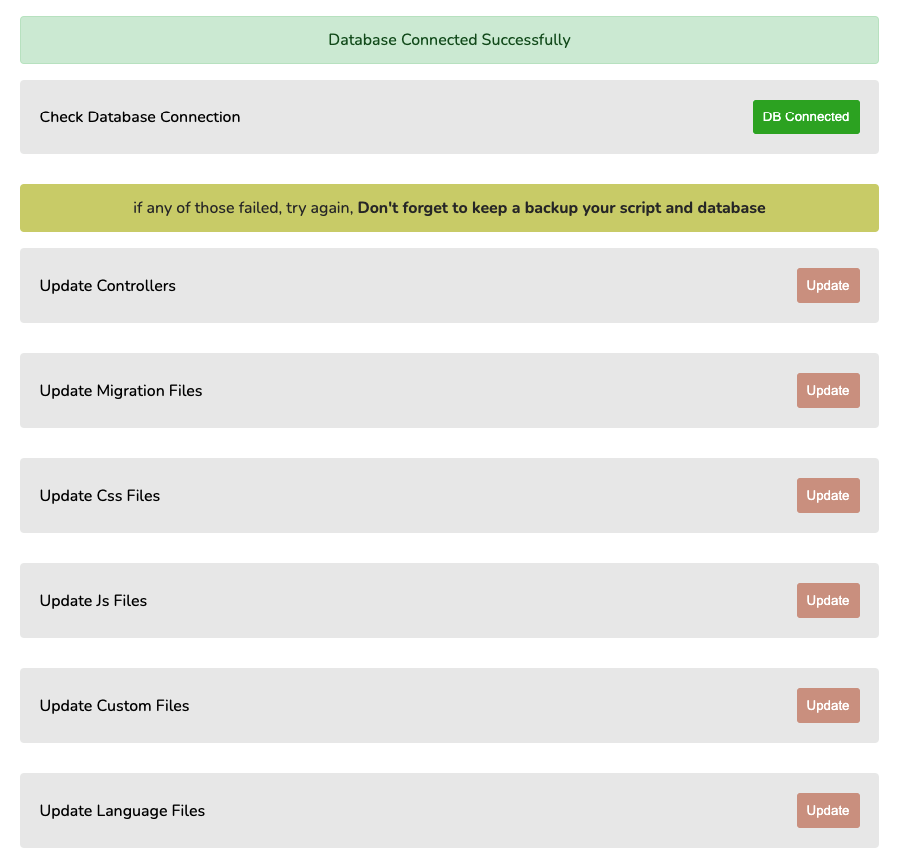
if all of update success you will see update success with green color as like below.
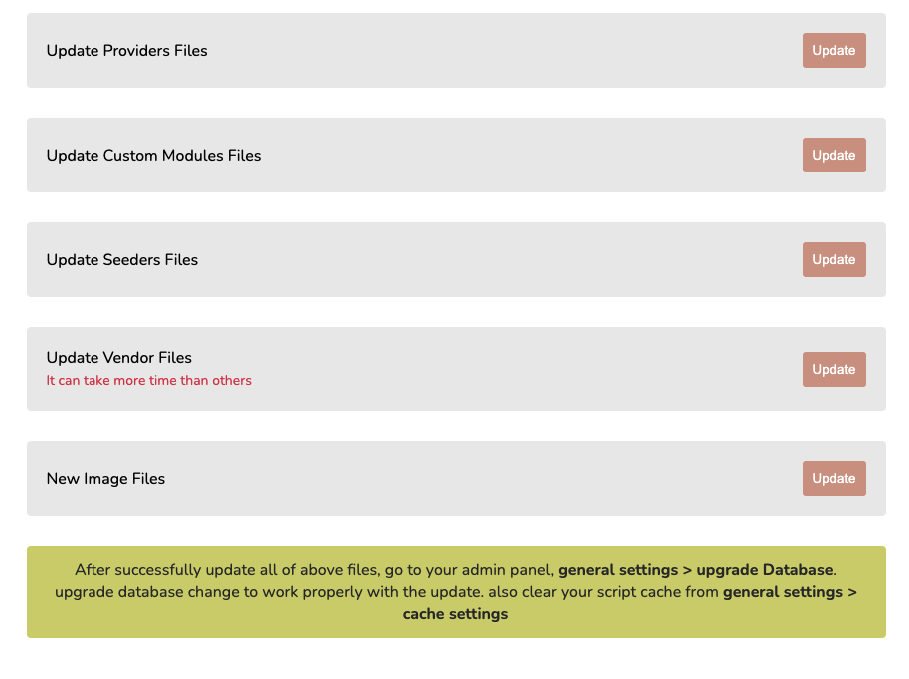
Step 10:
replace flutterwave rave “core>.env” file variable, we have upgrade our flutterwave rave api for the script. now you have to replace below variable with yours.
Remove this code.
RAVE_PUBLIC_KEY=YOUR_API_PUBLIC_KEY
RAVE_SECRET_KEY=YOUR_API_SECRET_KEY
RAVE_TITLE=""
RAVE_ENVIRONMENT=staging
Add this code
FLW_PUBLIC_KEY=YOUR_API_PUBLIC_KEY
FLW_SECRET_KEY=YOUR_API_SECRET_KEY
FLW_SECRET_HASH=""
Step 11:
congrats!! you update process is done, now you need to delete update folder and visit you site.
Do not forget to upgrade your website database from “general settings>Upgrade database”
Do not forget to clear your website cache from “general settings>cache settings”
We have upgrade our menu structure for improve our codebase, you may need to set your menu again to make it compatible with the new updated database structure
if you want to use newly added module in this script then follow below link to enable and setup them.
- Did Not Find Course Module After Update
- Did Not Find Appointment Module After Update ?
- Did Not Find Support Ticket Option After Update ?
if you are upgrading to Nexelit 3.0 then you have to add full code of google analytics in “general settings>third party settings”. also you have re add your footer widget because we have rewritten of widget builder core for give support to blog/event/knowledgebase/jobs sidebar edit option.
Enjoy Thanks for reading this article

