

The Manage Chatbot section allows you to fully customize, configure, and deploy your AI chatbot according to your brand and business needs. This module is divided into five main tabs: Appearance, Behavior, Configuration, Company Info, and Installation.
1. Appearance
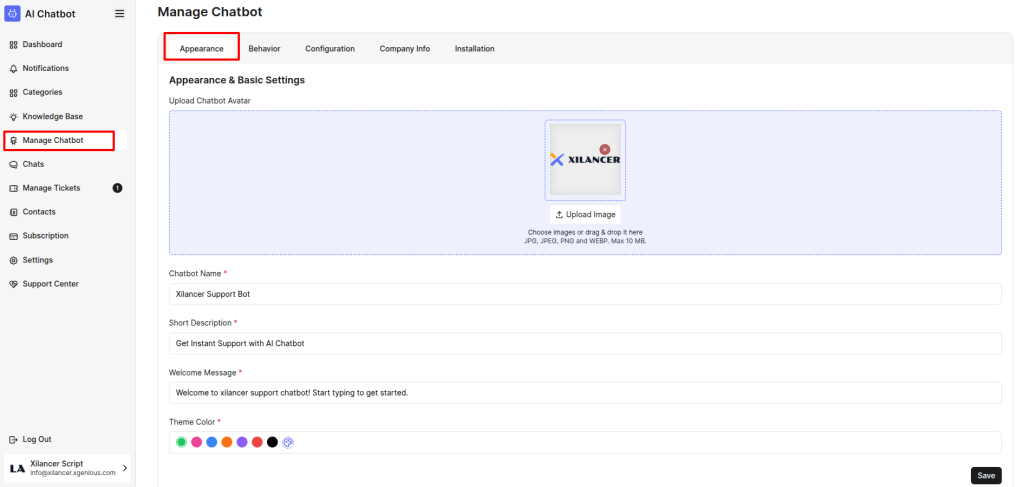
The Appearance tab lets you personalize the visual design of your chatbot to match your brand identity.From this section, you can:
-
Upload your chatbot logo or avatar
-
Set the chatbot name
-
Choose the theme color, including button and chat bubble colors
-
Customize the overall look and feel of the chat widget
These settings help ensure your chatbot blends seamlessly with your website or application.
 Screenshot
Chatbot Appearance
2. Behavior
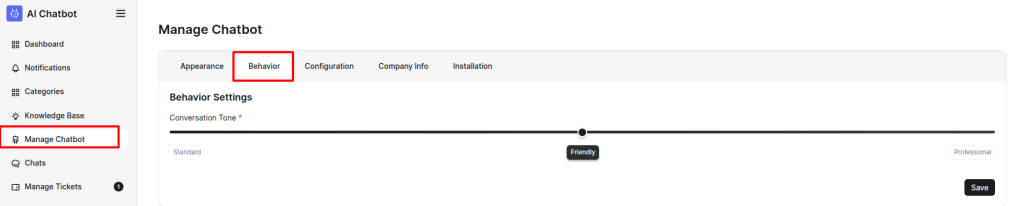
The Behavior tab allows you to adjust how your chatbot communicates with users.Here, you can configure:
- Conversation Tone – Select whether the chatbot should sound Standard, Friendly, or Professional
This section helps you tailor the chatbot’s personality to your brand’s voice.
 Screenshot
3. Configuration
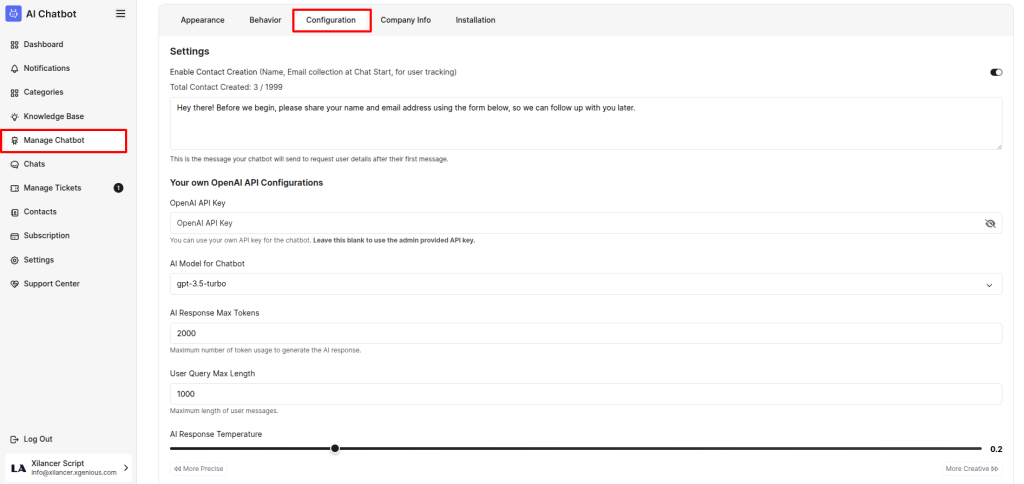
The Configuration tab allows you to control how the chatbot collects user details, interacts with the OpenAI API, and manages response generation. This section includes all essential settings that determine how your chatbot processes user messages and produces replies.
Contact Creation Settings
-
Enable Contact CreationWhen enabled, the chatbot will collect the user’s name and email address at the start of the conversation for tracking and follow-up purposes.
-
Total Contact Created:
3 / 1999Displays how many contacts have been created out of your remaining limit. -
Contact Request MessageYou can customize the message shown to users when the chatbot asks for their details:“Hey there! Before we begin, please share your name and email address using the form below, so we can follow up with you later.”
OpenAI API Configuration
-
OpenAI API KeyYou can input your own OpenAI API key to power the chatbot.If left blank, the system will automatically use the admin-provided key.
-
AI Model for ChatbotSelect which AI model the chatbot should use for generating responses.
AI Response Settings
Higher values = More Creative
Lower values = More PreciseDefault: 0.2
AI Response Max TokensMaximum number of tokens allowed for each AI-generated response.Default: 2000 tokens
User Query Max LengthMaximum length of user messages accepted by the chatbot.Default: 1000 characters
AI Response TemperatureControls how creative or precise the chatbot responses will be.
 Screenshot
4. Company Info
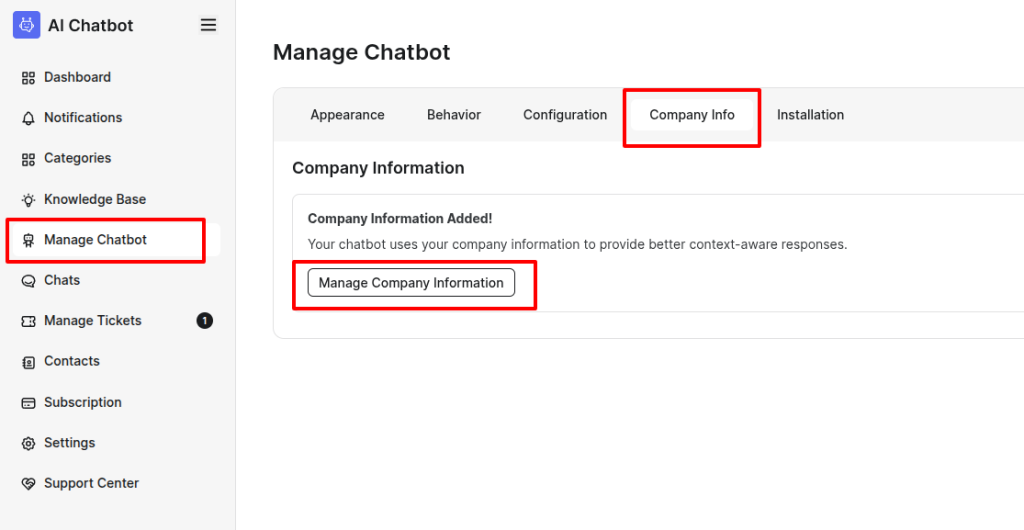
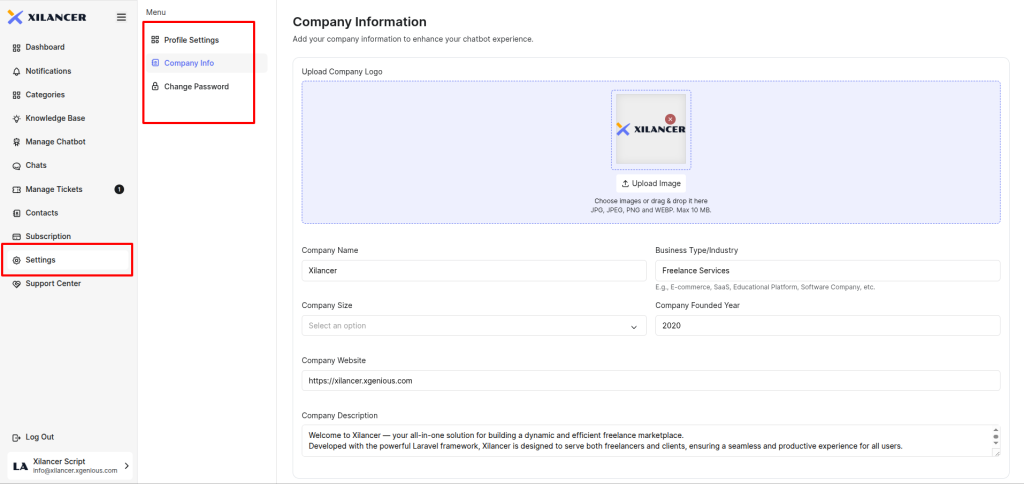
The Company Info tab allows you to manage your organization's basic information. After navigating to this tab, click the Manage Company Information button to be redirected to the dedicated page where you can update and maintain all company-related details.
You can also access this page directly from the main sidebar under the Settings menu.
 Screenshot
 Screenshot
Company Information Manage Page
5. Installation
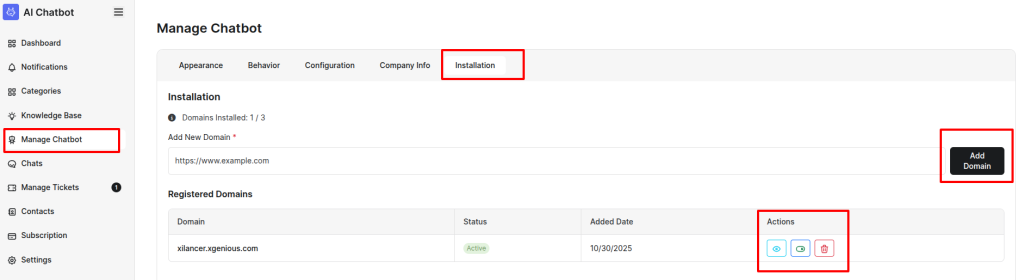
The Installation tab provides the integration tools needed to add the chatbot to your website.
From this panel, you can:
-
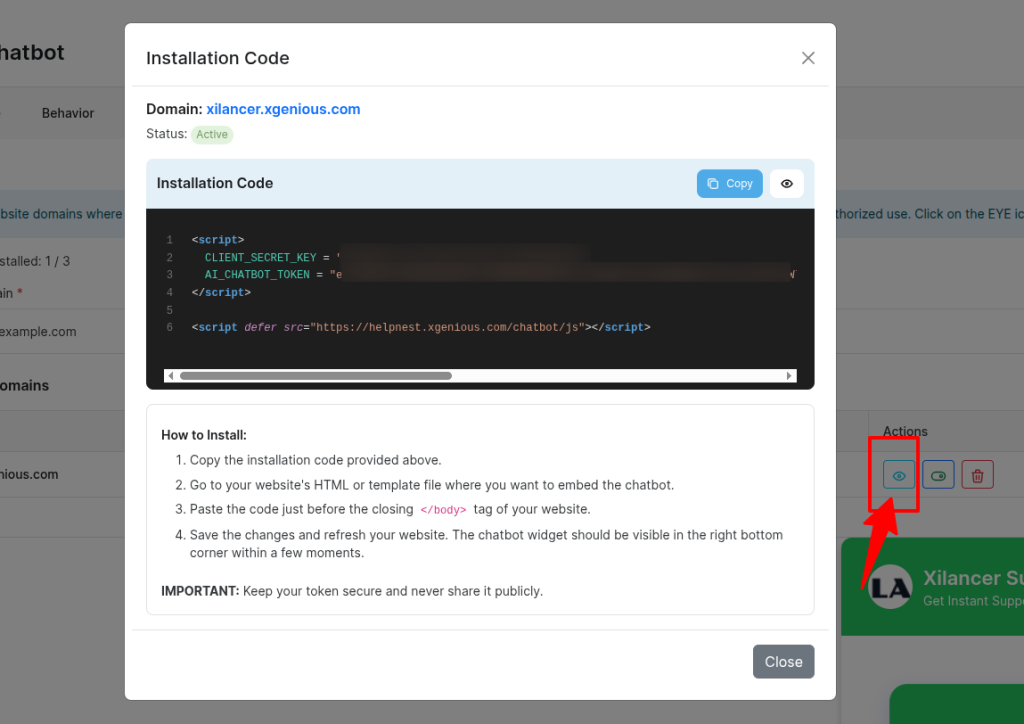
Retrieve your chatbot installation script
-
Add and register new domains where the chatbot will be embedded
-
View all registered domains along with their status
-
Remove or manage domains using the action buttons
-
Find the embed script needed to install the chatbot on your site
This section ensures you can easily deploy and manage the chatbot across any domain you own.
 Screenshot
 Screenshot
Chatbot Installation Code