

We will guide you step by step into add custom domain for your user website.
Step 01:
user can request for custom domain for his website from user panel -> Custom Domain
Step 02: Click on Request Custom Domain button for request a custom domain for user subdomain.
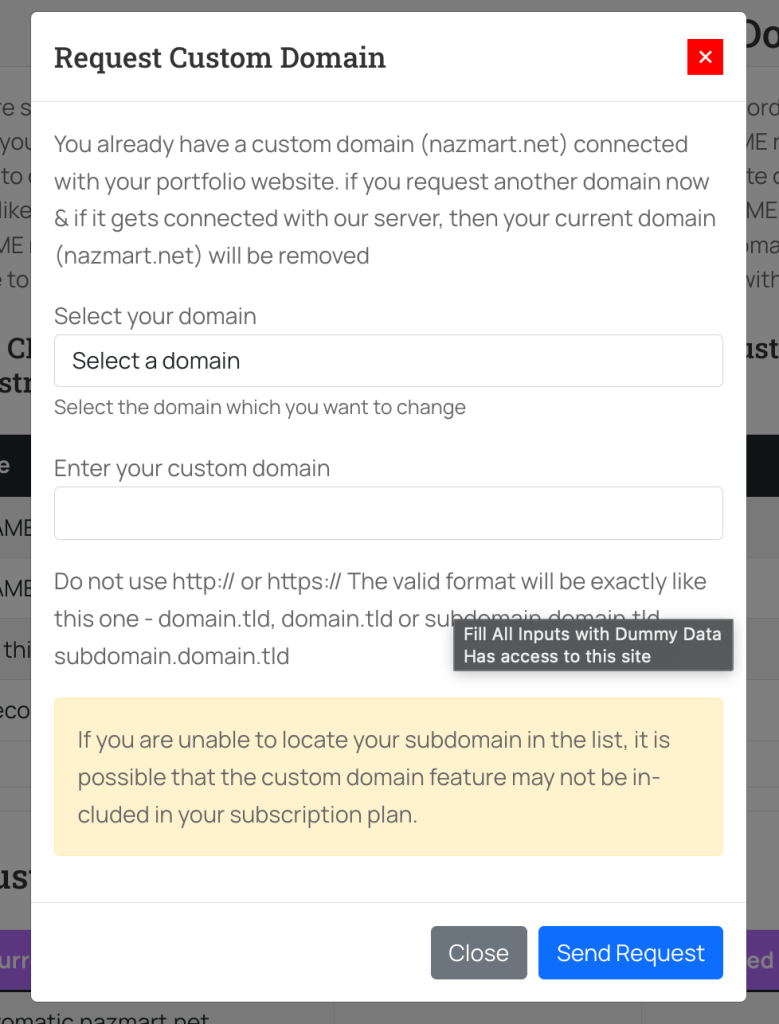
now you will see this option after clicked that button
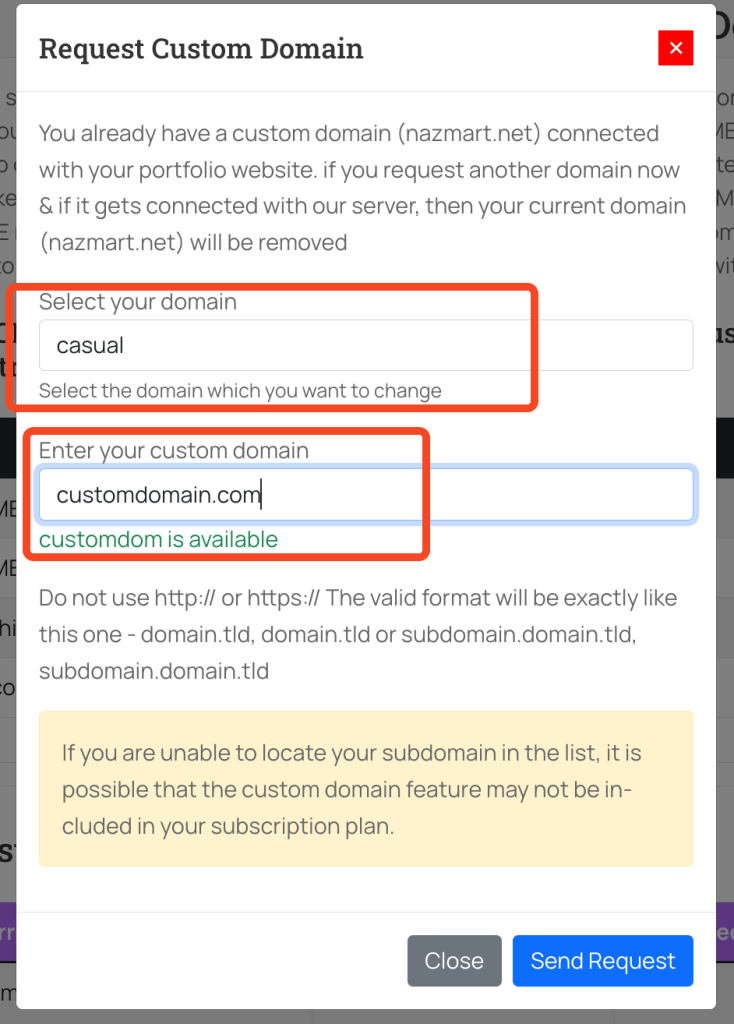
here user have to select their website and the custom domain they want to add.
Step 03
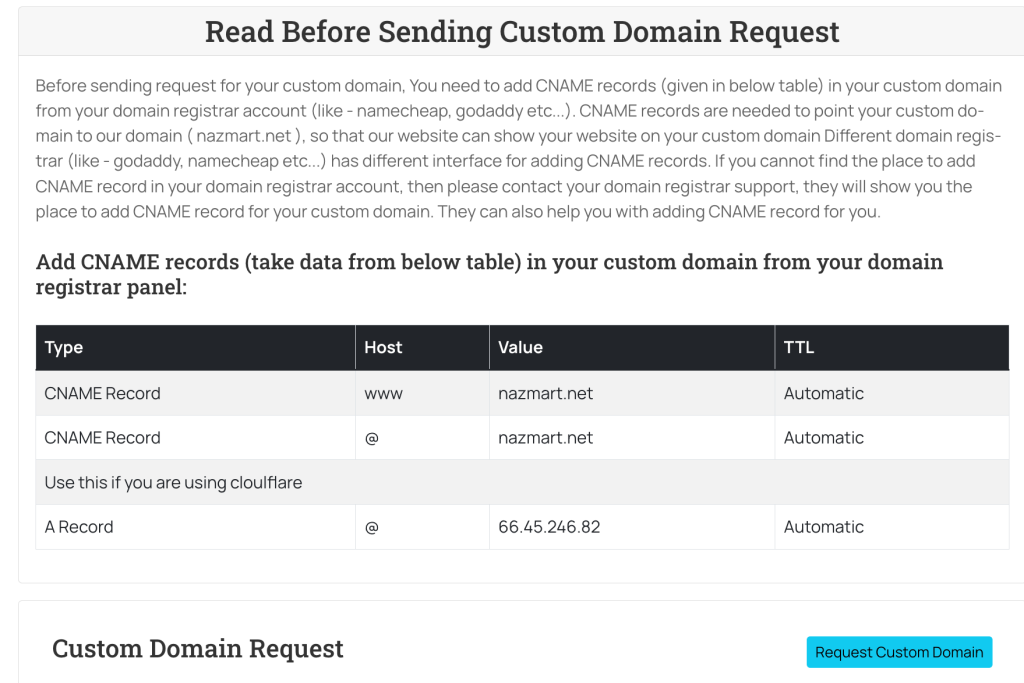
Most important is this point. your user must have to add their user panel shown cname record in their user domain panel.
Step 04: ( admin part start from here)
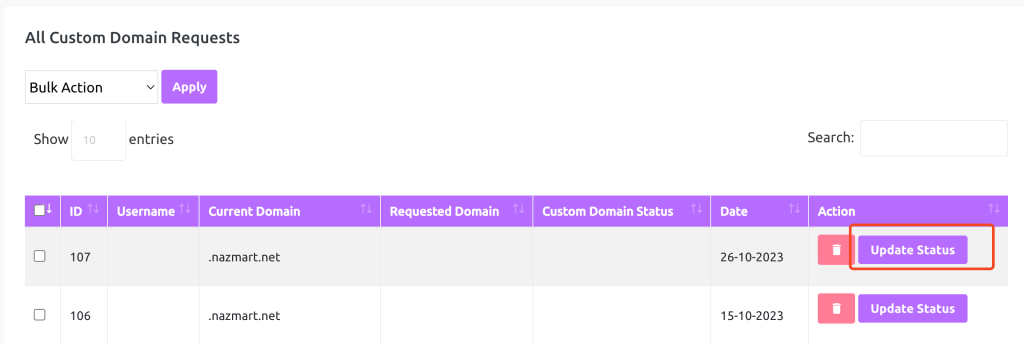
Now admin will see a new custom domain request in admin panel
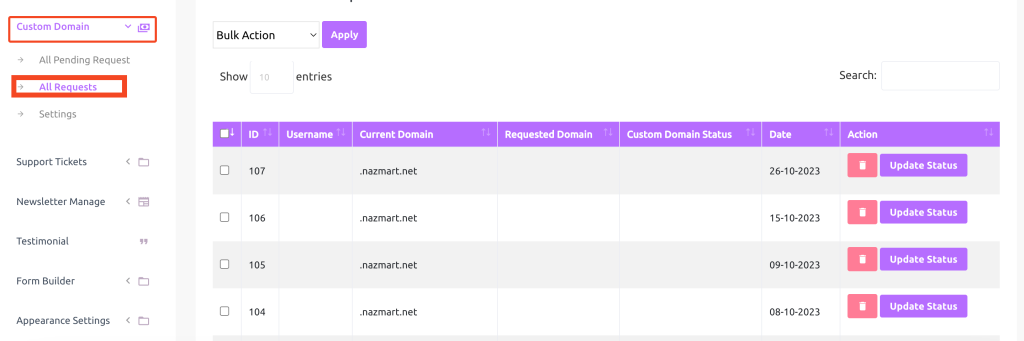
now you need to change the update status into in progress
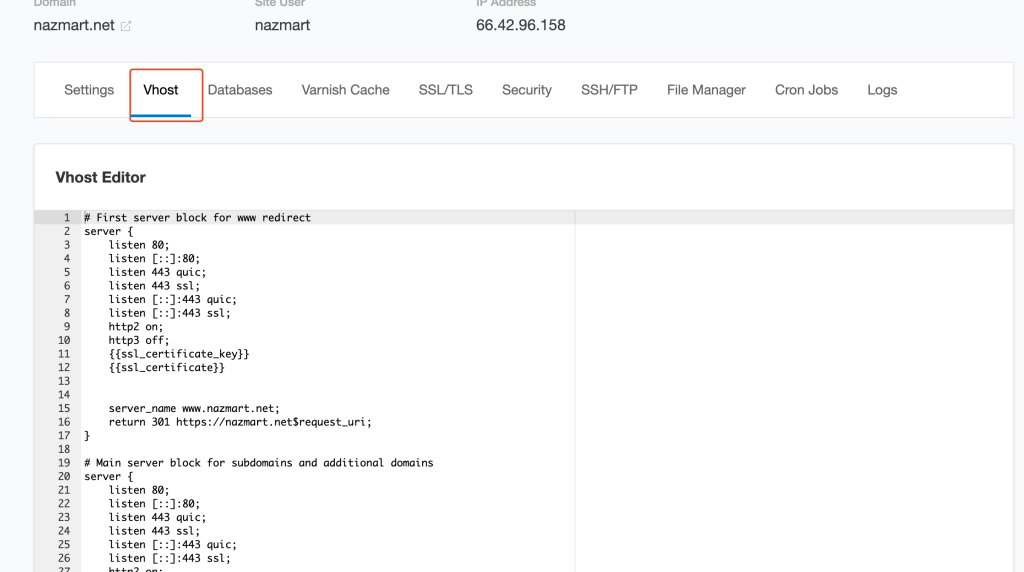
Step 05: ( add the domain into server to make it actually work )
We are showing example of cloud panel, but this process is almost same for all other panel, you might see change in the ui of this settings
login to your cloud panel and go to your website manage -> Vhost
domain is not connected successfully, not it will still take 24/74hour to propagate dns changes.
here is full vhost code
# First server block for www redirect
server {
listen 80;
listen [::]:80;
listen 443 quic;
listen 443 ssl;
listen [::]:443 quic;
listen [::]:443 ssl;
http2 on;
http3 off;
{{ssl_certificate_key}}
{{ssl_certificate}}
server_name www.nazmart.net;
return 301 https://nazmart.net$request_uri;
}
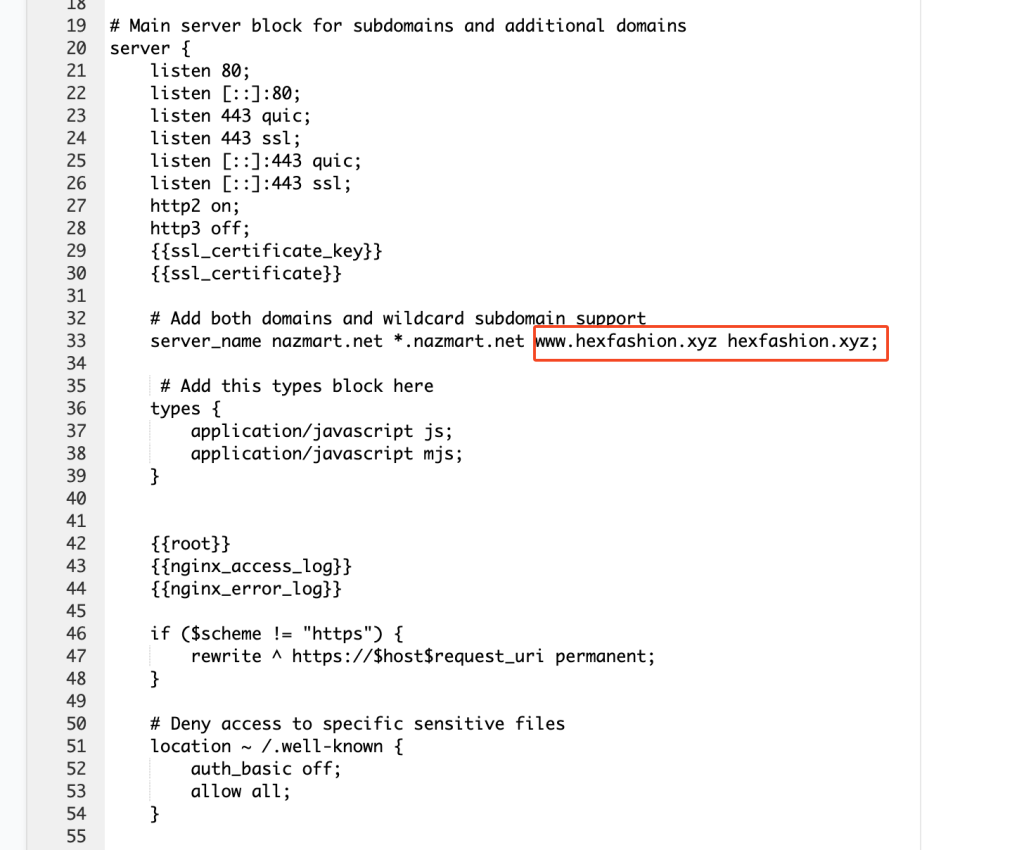
# Main server block for subdomains and additional domains
server {
listen 80;
listen [::]:80;
listen 443 quic;
listen 443 ssl;
listen [::]:443 quic;
listen [::]:443 ssl;
http2 on;
http3 off;
{{ssl_certificate_key}}
{{ssl_certificate}}
# Add both domains and wildcard subdomain support
server_name nazmart.net *.nazmart.net www.hexfashion.xyz hexfashion.xyz;
# Add this types block here
types {
application/javascript js;
application/javascript mjs;
}
{{root}}
{{nginx_access_log}}
{{nginx_error_log}}
if ($scheme != "https") {
rewrite ^ https://$host$request_uri permanent;
}
# Deny access to specific sensitive files
location ~ /.well-known {
auth_basic off;
allow all;
}
# Deny access to specific sensitive files
location ~ \.(env|config|gitignore|htaccess|htpasswd)$ {
deny all;
access_log off;
log_not_found off;
}
# Deny access to backup/config/source files
location ~ \.(bak|config|sql|fla|psd|ini|log|sh|inc|swp|dist|old|git|yml|yaml)$ {
deny all;
access_log off;
log_not_found off;
}
location ~* \.js$ {
types { application/javascript js; }
add_header Content-Type application/javascript;
default_type application/javascript;
}
{{settings}}
location / {
{{varnish_proxy_pass}}
proxy_set_header Host $host;
proxy_set_header X-Forwarded-Host $host;
proxy_set_header X-Real-IP $remote_addr;
proxy_set_header X-Forwarded-For $proxy_add_x_forwarded_for;
proxy_hide_header X-Varnish;
proxy_redirect off;
proxy_max_temp_file_size 0;
proxy_connect_timeout 720;
proxy_send_timeout 720;
proxy_read_timeout 720;
proxy_buffer_size 128k;
proxy_buffers 4 256k;
proxy_busy_buffers_size 256k;
proxy_temp_file_write_size 256k;
}
# location ~* ^.+\.(css|js|jpg|jpeg|gif|png|ico|gz|svg|svgz|ttf|otf|woff|woff2|eot|mp4|ogg|ogv|webm|webp|zip|swf|map|mjs)$ {
# include mime.types; # Add this line
# default_type application/octet-stream; # Add this line
# types {
# application/javascript js;
# application/javascript mjs;
# }
# add_header Access-Control-Allow-Origin "*";
# add_header alt-svc 'h3=":443"; ma=86400';
# expires max;
# access_log off;
# }
location ~ /\.(ht|svn|git) {
deny all;
}
if (-f $request_filename) {
break;
}
}
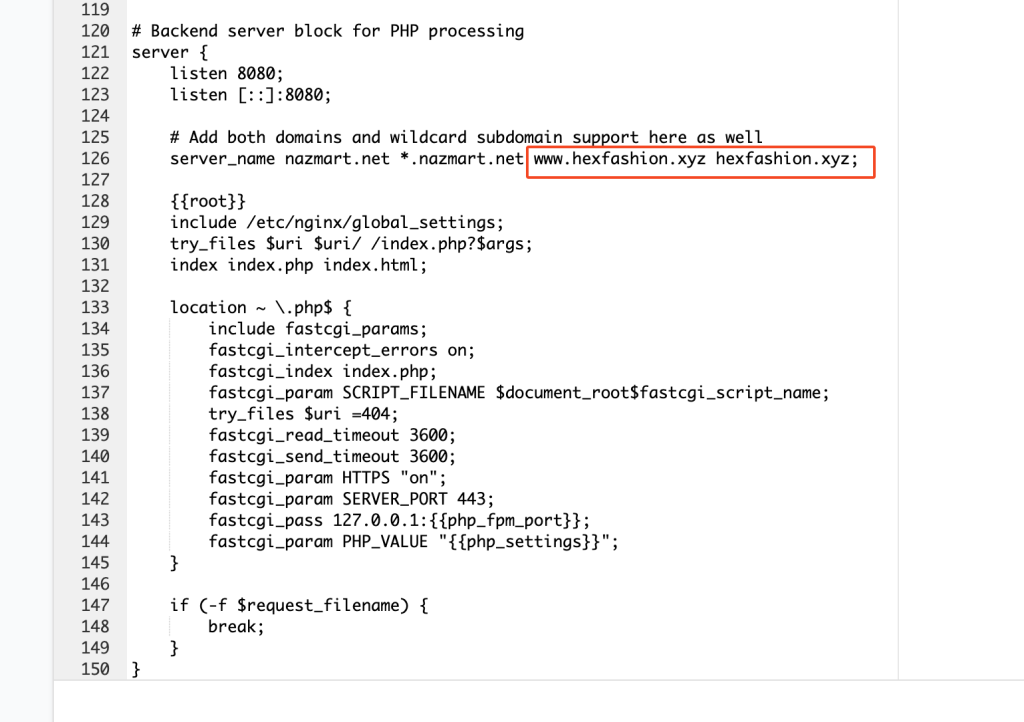
# Backend server block for PHP processing
server {
listen 8080;
listen [::]:8080;
# Add both domains and wildcard subdomain support here as well
server_name nazmart.net *.nazmart.net www.hexfashion.xyz hexfashion.xyz;
{{root}}
include /etc/nginx/global_settings;
try_files $uri $uri/ /index.php?$args;
index index.php index.html;
location ~ \.php$ {
include fastcgi_params;
fastcgi_intercept_errors on;
fastcgi_index index.php;
fastcgi_param SCRIPT_FILENAME $document_root$fastcgi_script_name;
try_files $uri =404;
fastcgi_read_timeout 3600;
fastcgi_send_timeout 3600;
fastcgi_param HTTPS "on";
fastcgi_param SERVER_PORT 443;
fastcgi_pass 127.0.0.1:{{php_fpm_port}};
fastcgi_param PHP_VALUE "{{php_settings}}";
}
if (-f $request_filename) {
break;
}
}Step 06: ( final step )
now need to change the custom domain request from “In Progress” to “connected“
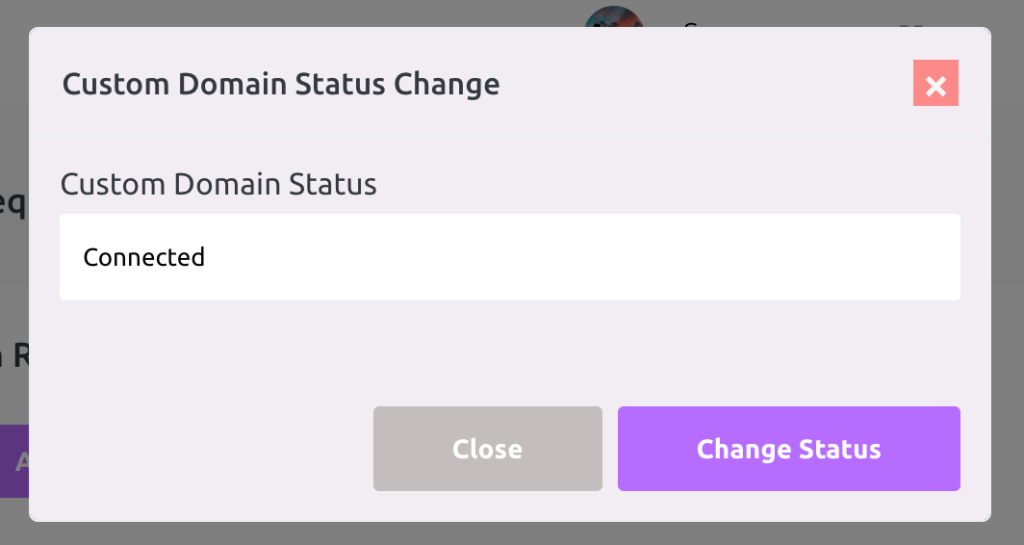
once the status is changes to connected, wait for 5 to 10min, then the website load on user domain instead of your subdomain.
that’s all for configure custom domain in cloud panel.