

1. First search for “Firebase” in google
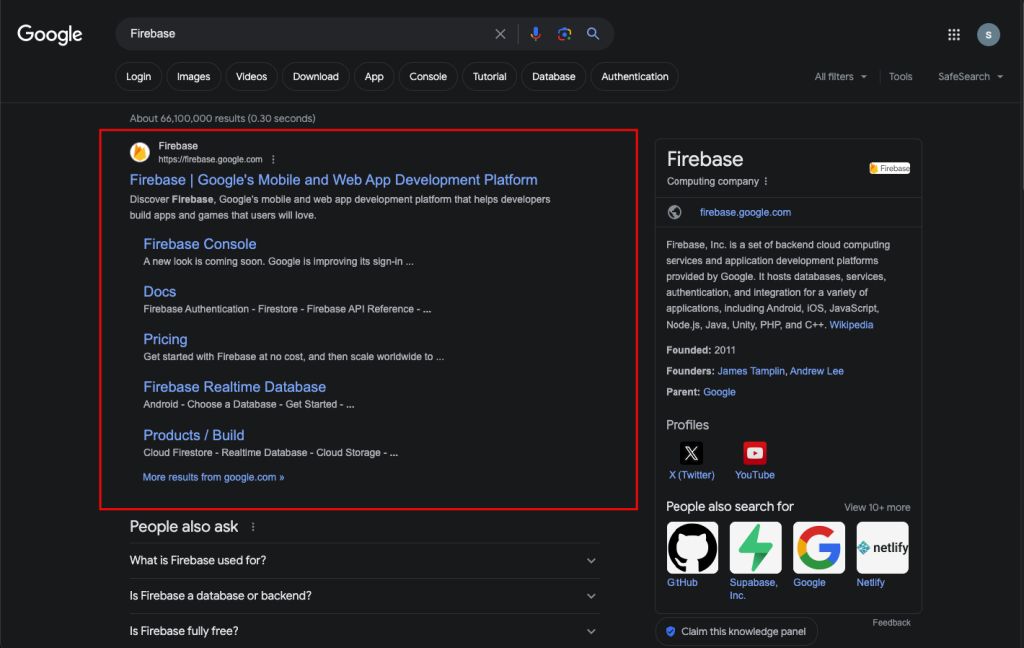
2. Click on the first result
3. Login to google
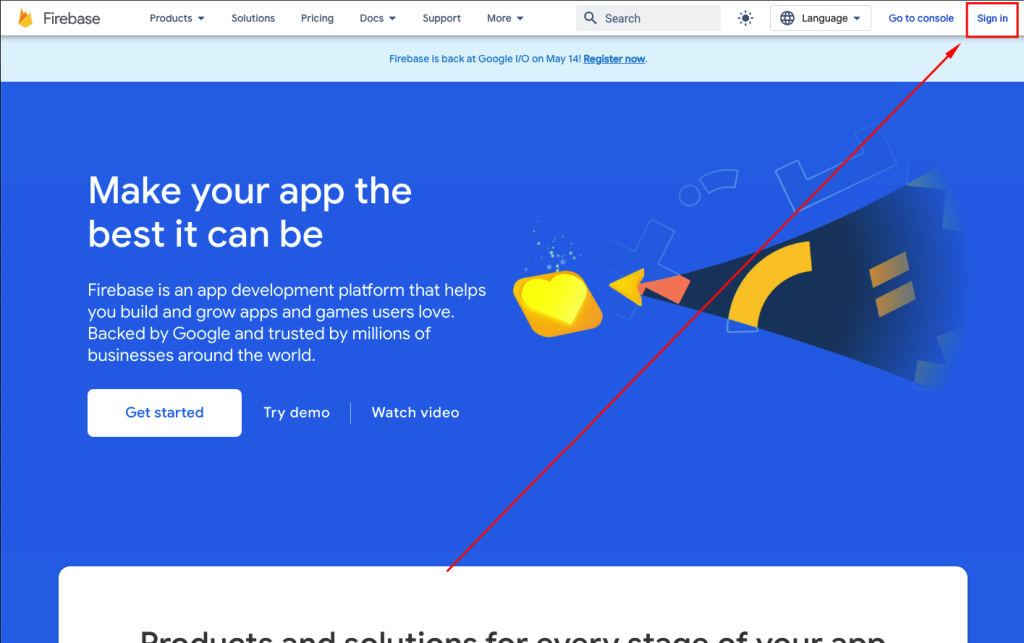
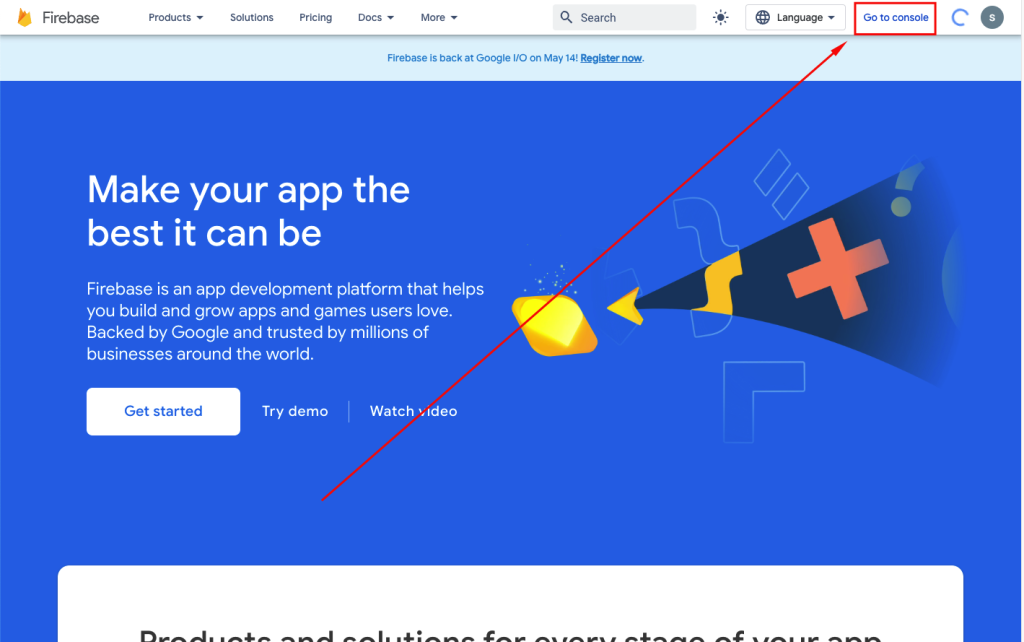
4. Click the “Go to console” button on the top-right corner
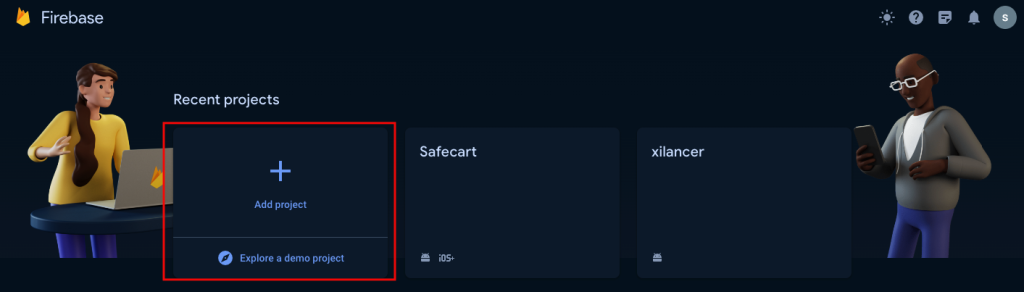
5. Click on “Add a project”
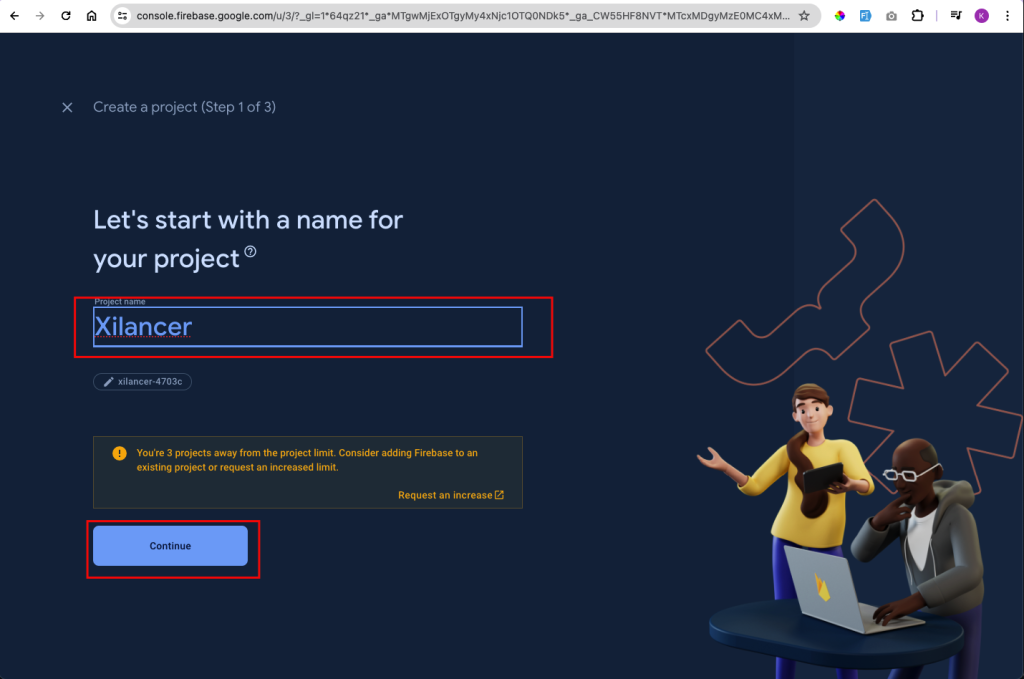
6. Enter your project name then click “Continue”
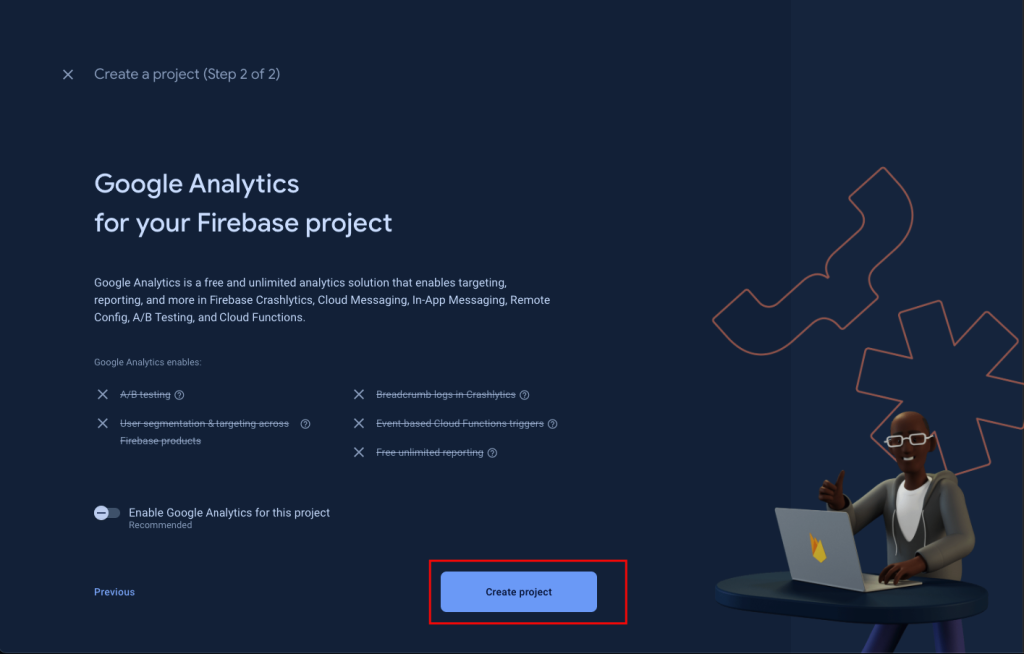
7. You don’t have to change in the “Google Analyticsfor your Firebase project” section and click “Continue”
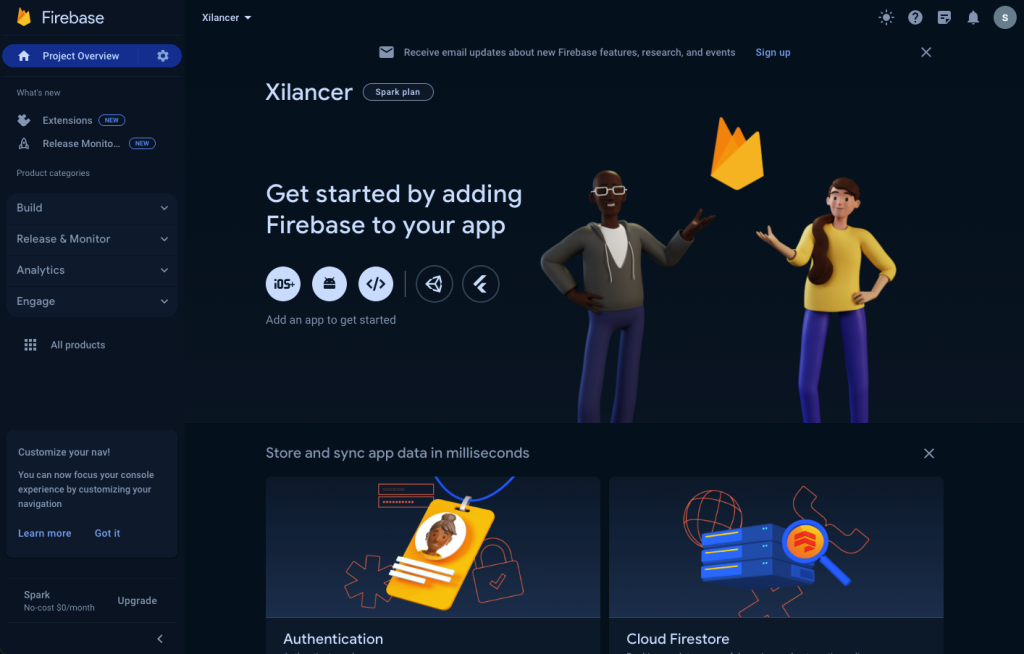
8. The project creation might take a moment. After the project is created you will routed to the overview page
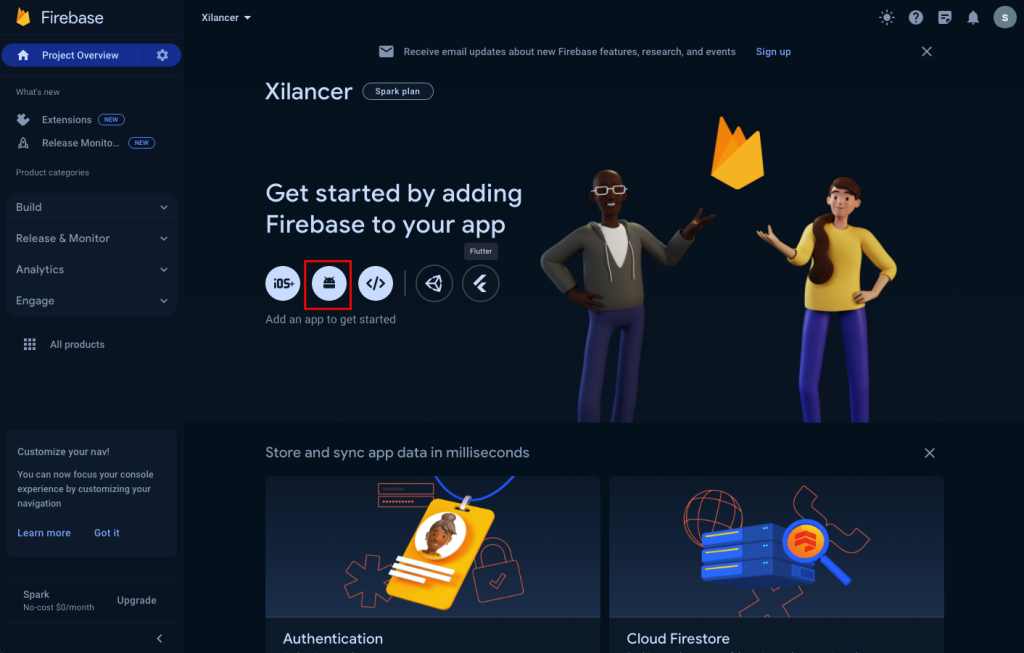
9. Click not the android icon on top of the “Add an app to get started”
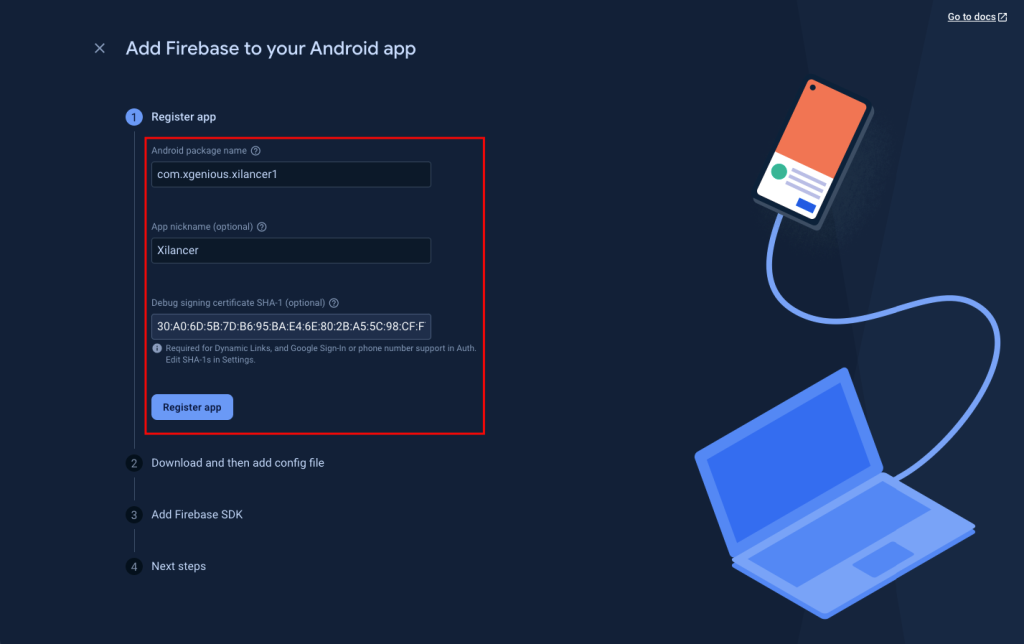
10. Provide the required informations an click “Register app”
11. You don’t have to anything for the next steps. So just click “Next” for next 2 steps and click “Continue to the console” for the 4th/last step
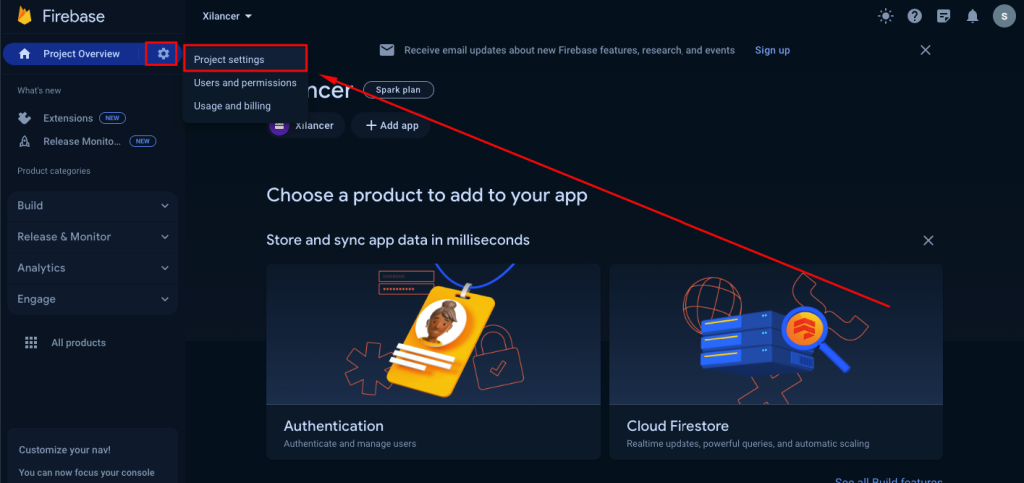
12. You will be routed to project over-view again. In the top-right corner click the “Setting” icon next to the “Project overview” then click the “Project settings” option
13. Scroll at the bottom of the page. Enter any other SHA-1 keys if you need to. (Normally you will have one debug SHA-1 and one release SHA-1, if you don’t add the debug SHA-1 then you will find it troubling to work in debug mode.)
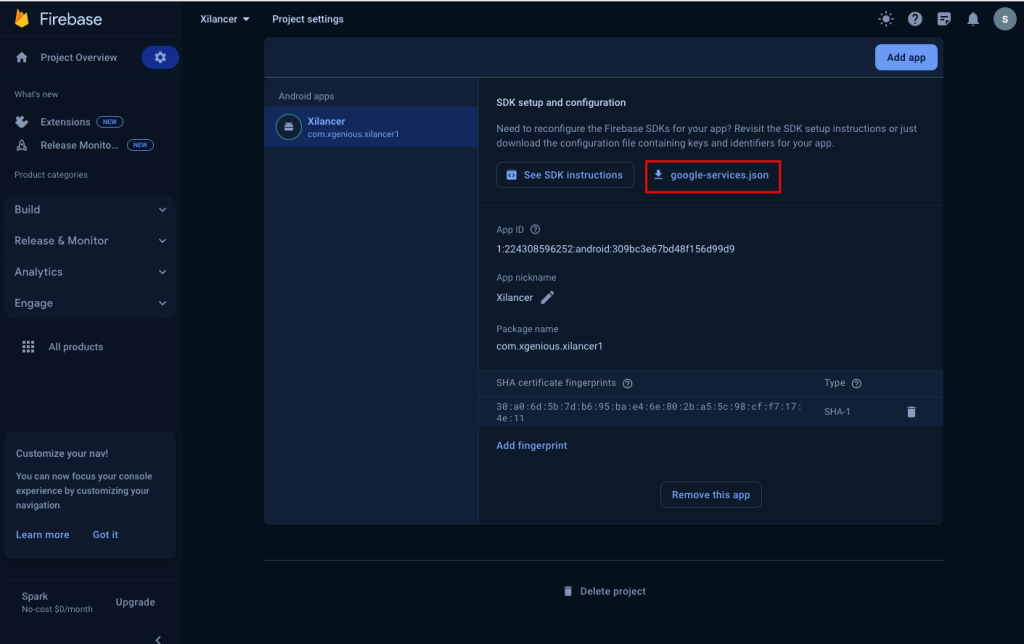
15. Click on the “google-services.json” which will start downloading the file. (every time you change anything here, you will have to download this file again)
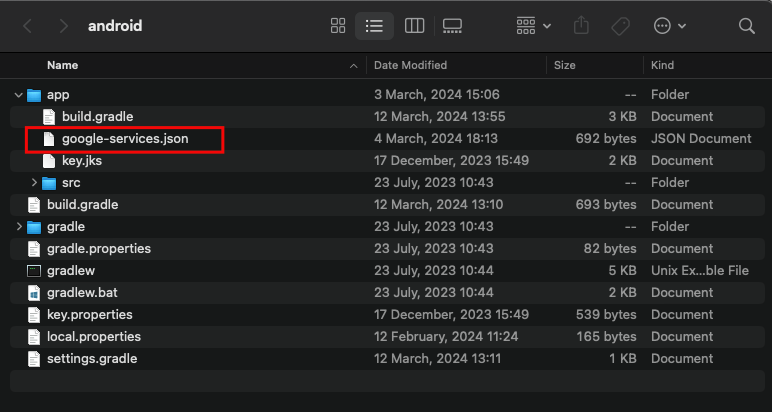
16. Once the file downloaded, go to project folder-> android-> app folder and replace the existing “google-services.json” with your downloaded file.
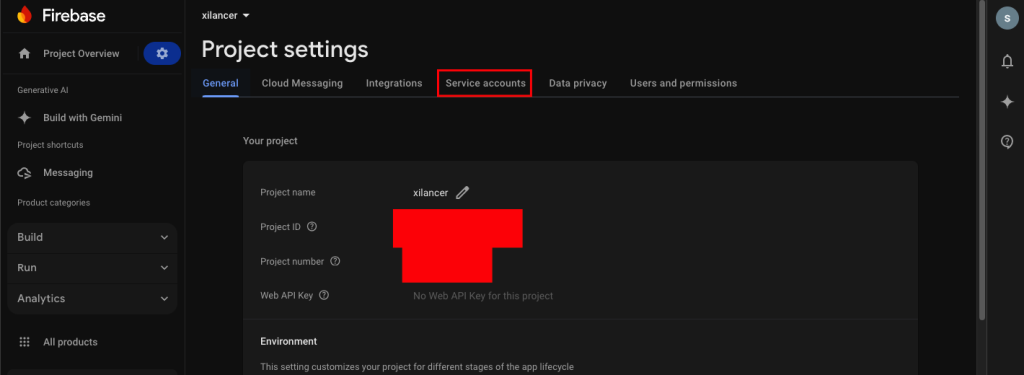
17. Now go click on “Service accounts” tab.
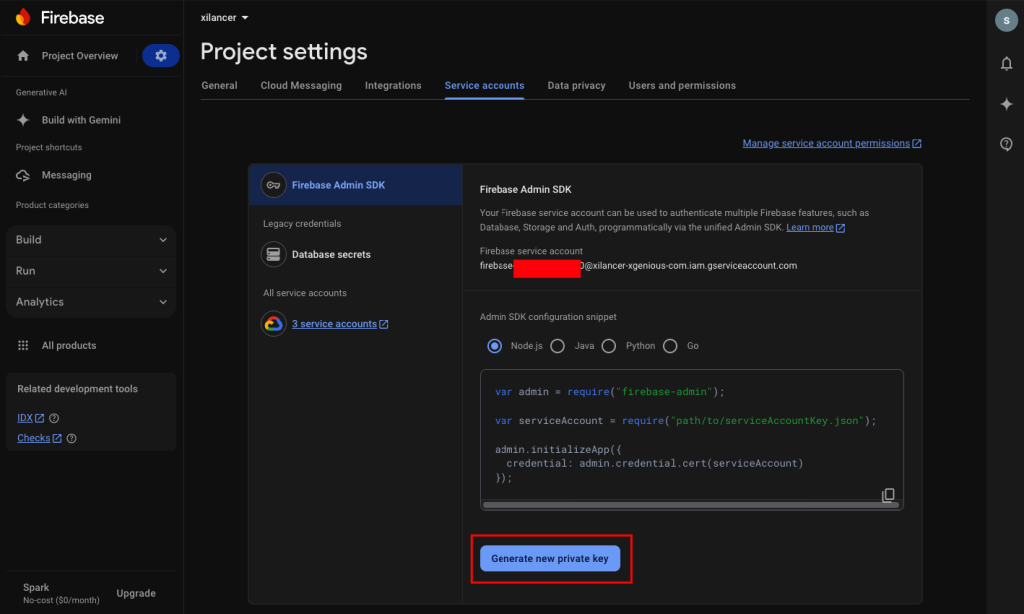
18. Click on the “Generate new private key“.
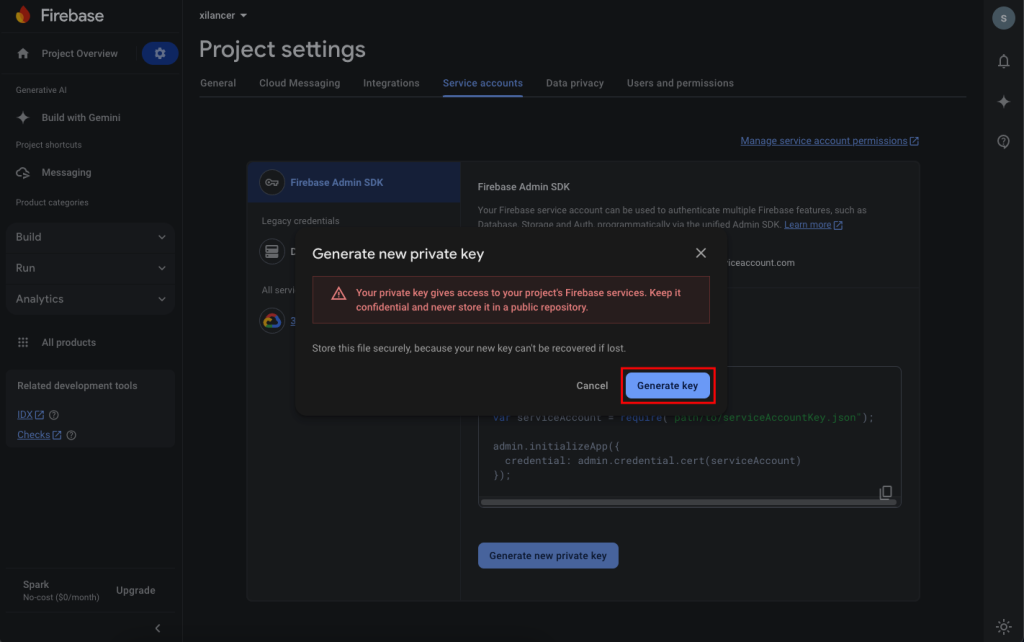
19. Click on Generate key and a json file should be downloaded.
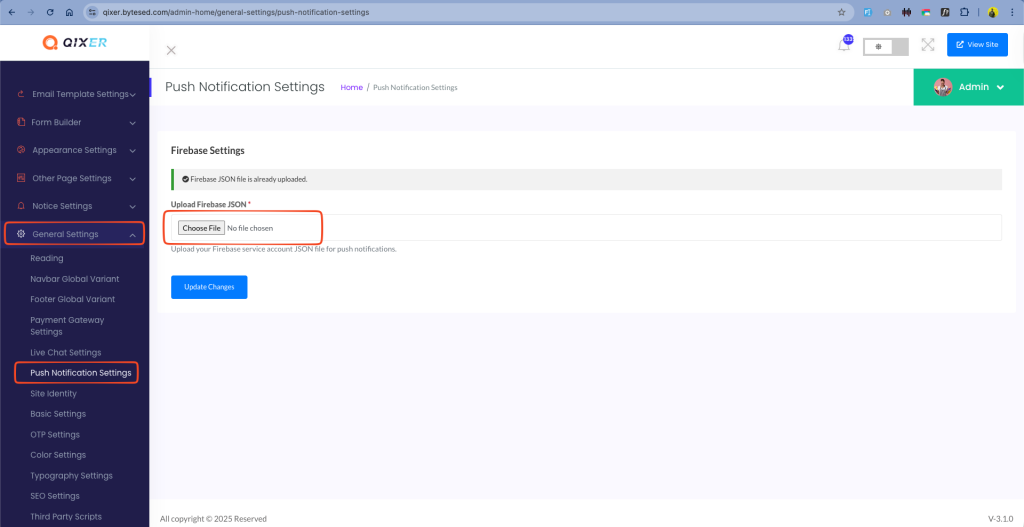
20. Go to your website admin panel-> General Settings -> Push Notification Settings. Upload the json file you got and click Update
You should be good to go now.
21. If you want to add google sign-in to your app then follow the next steps. If not your Firebase setup for the app is done so you can skip the later parts of this documentation.
22. Search for “google cloud console”
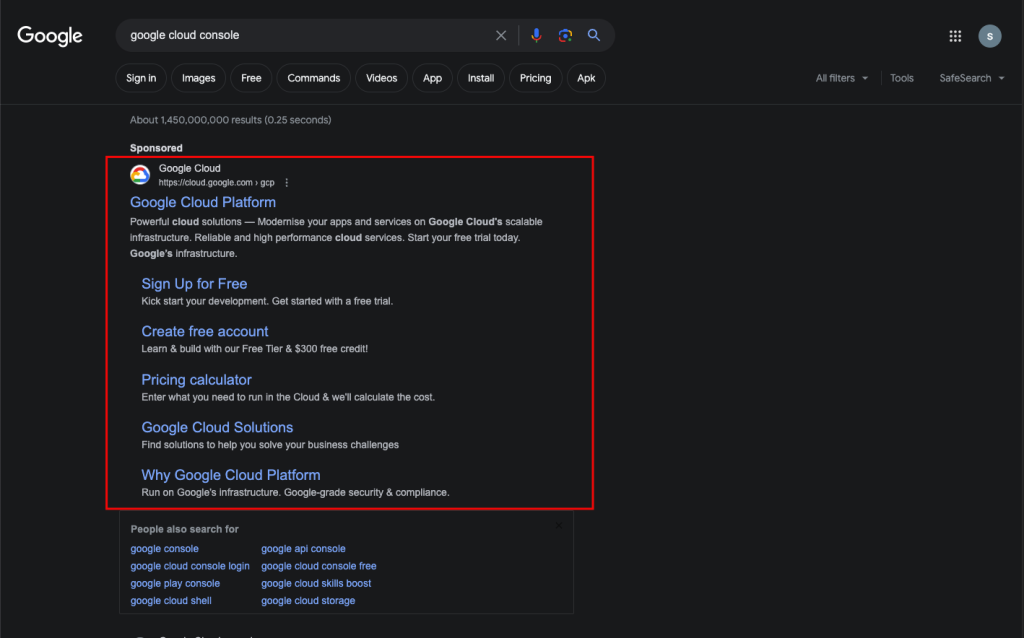
23. Click the first result
24. Login to your account if needed
25. Click the “Console” button on the top-right corner

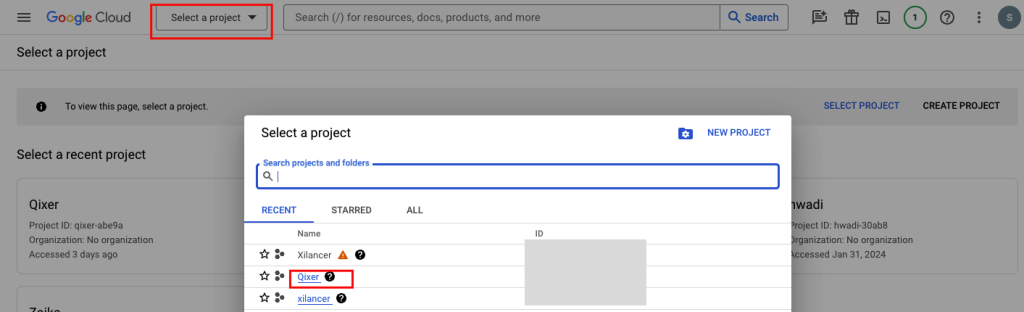
26. Select your project from the top-left corner dropdown
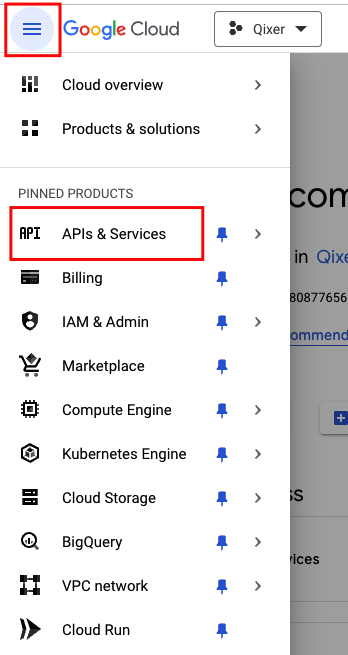
27. Click the option icon and at the top-left corner
28. Click the “APIs and services” option
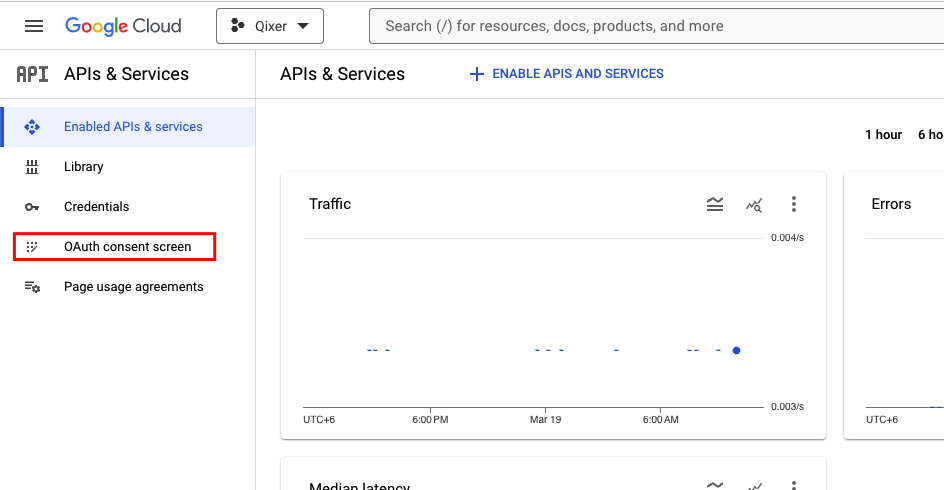
29. Click the “OAuth consent screen” option from the left panel
30. Chose “External” and click “Create”
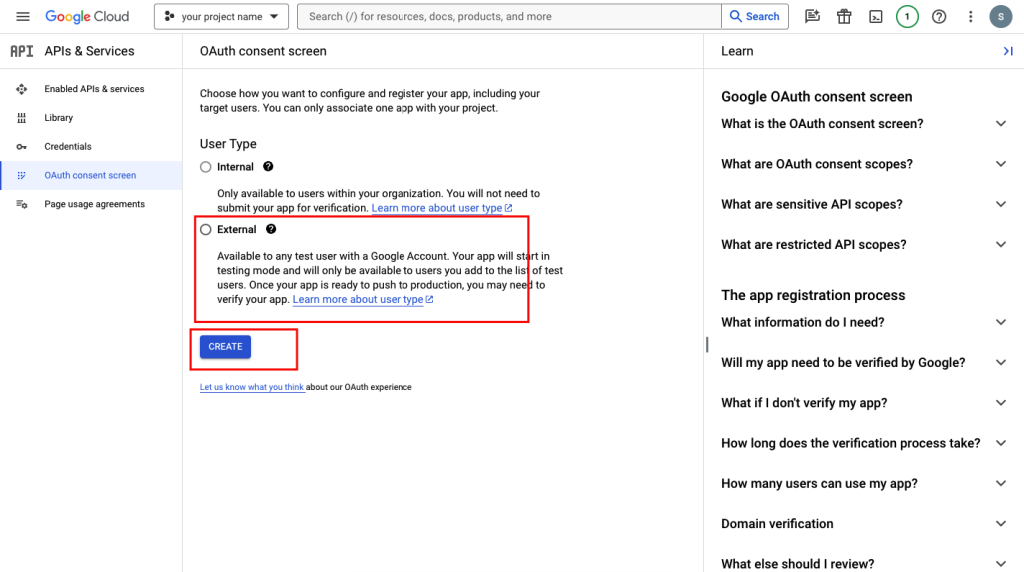
31. Provide the necessary informations and click “SAVE AND CONTINUE” for the next two steps and click “BACK TO DASHBOARD” for the last step
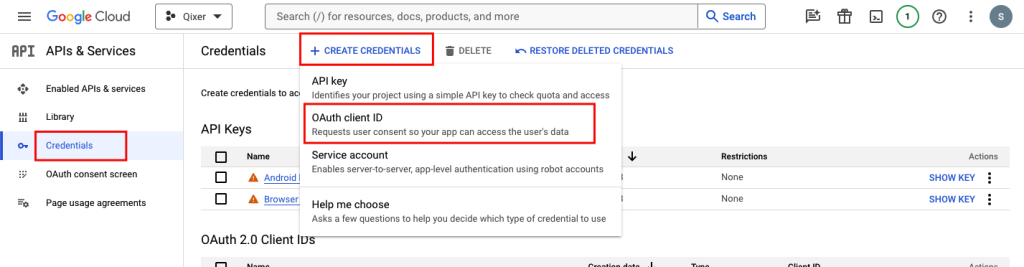
32. Click on Credentials -> CREATE CREDENTIALS -> OAuth client ID
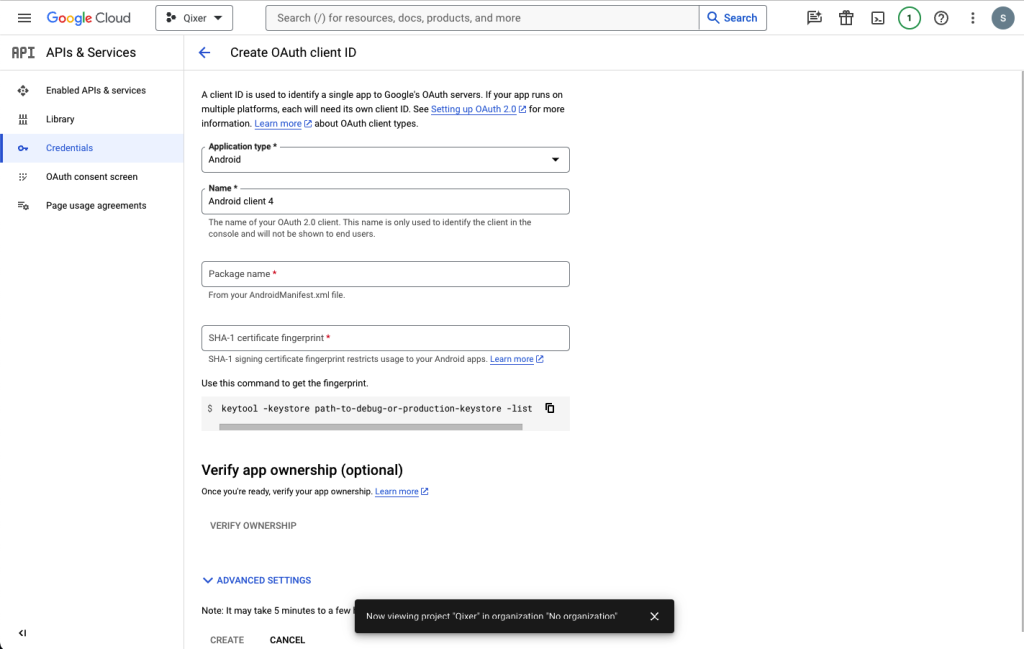
33. Select Application type -> Android and provide necessary info. Then click Create. If you have multiple SHA-1 key, then create multiple OAuth client ID.
34. With this you have setup every thing you need to setup for google sign-in