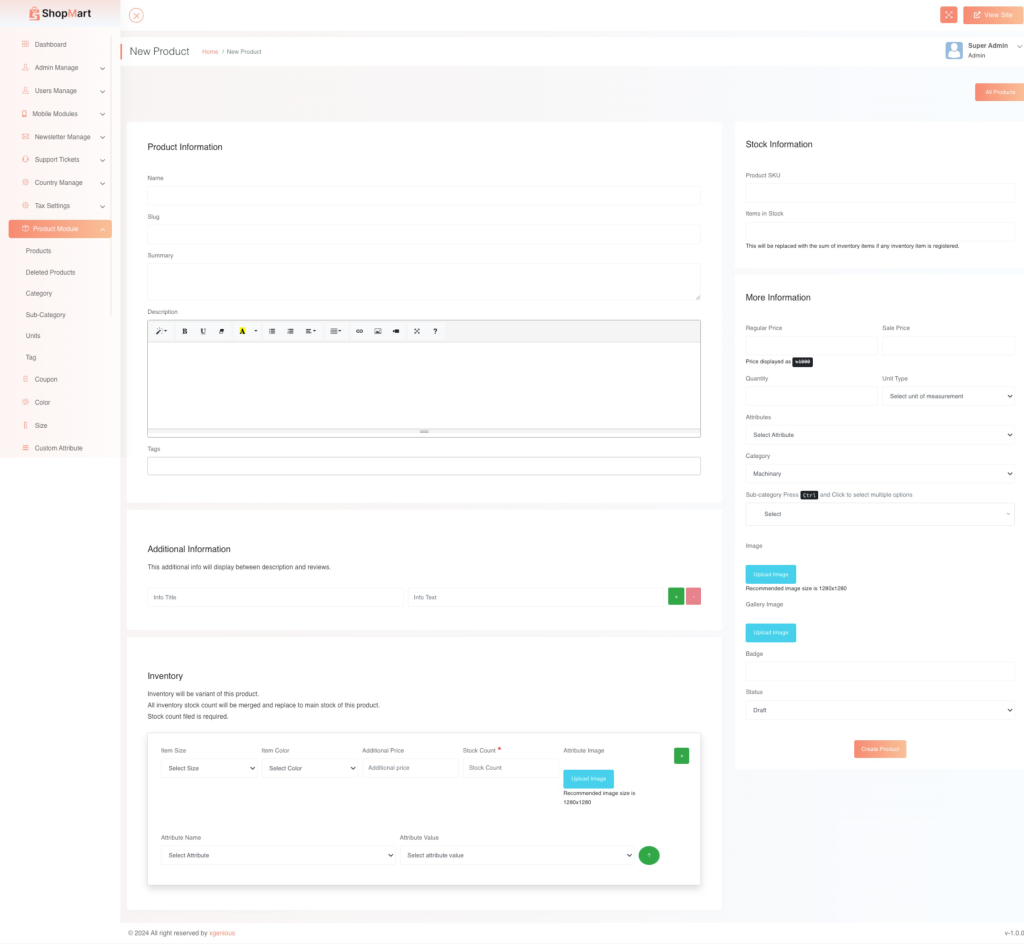
To add new product go to ” Products Module>Add New Product”

1. Navigate to the “New Product” Section
- From the dashboard, select Product Module on the left-hand side, then click New Product to access the product creation form.
2. Fill in the Product Information
- Name: Enter the product’s name.
- Slug: Add a unique identifier for the product URL.
- Summary: Write a brief summary of the product.
- Description: Add detailed information about the product using the WYSIWYG editor.
- Tags: Assign tags to categorize your product for easy filtering.
3. Fill in Additional Information
- Info Title: Add any additional title for more information that will appear between the description and reviews.
- Info Text: Provide detailed information related to the above title.
4. Manage the Stock Information
- Product SKU: Enter the SKU (Stock Keeping Unit) of the product.
- Items in Stock: Specify the stock quantity.
5. Set More Information
- Regular Price: Enter the original price.
- Sale Price: If applicable, enter the sale price.
- Price Displayed: Choose how the price is displayed (includes/excludes tax).
- Quantity: Specify the available quantity.
- Unit Type: Select the unit of measurement (e.g., kilogram, liter).
- Attributes: Choose any attributes that apply (e.g., size, color).
- Category: Select the category the product belongs to (e.g., Machinery).
- Sub-Category: Choose one or more subcategories, if available.
- Image: Upload the main product image and any additional gallery images.
6. Fill in the Inventory Section
- Item Size: Select the product size.
- Item Color: Choose the product color.
- Additional Price: If the selected size or color increases the price, specify the additional amount.
- Stock Count: Set the stock count for the variant.
- Attribute Image: Upload an image for the variant (size/color).
You can add multiple variants using the green plus icon (+) or remove them using the red minus icon (-).
7. Set the Product Badge
- If applicable, assign a badge (e.g., New Arrival, Bestseller).
8. Set the Status
- Choose the product’s status (e.g., Draft, Published).
9. Finalize the Product Creation
- Once all fields are filled out, click the Create Product button to save the new product.

