- Go to Facebook Login for iOS – Quickstart and select or create your app.
 Screenshot
-
Skip the step 2 (Set up Your Development Environment).
-
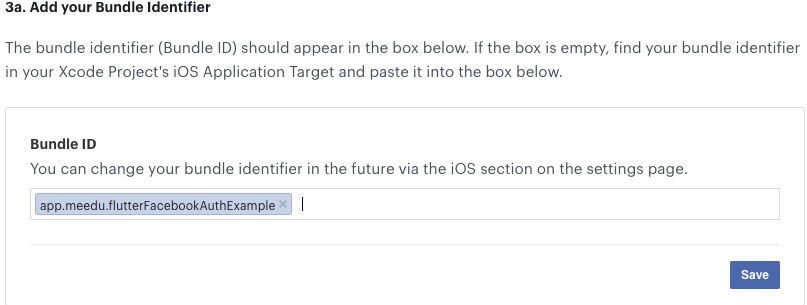
the step 3 (Register and Configure Your App with Facebook) you need add your
Bundle Identifier
 Screenshot
- In the Step 4 you need configure your
Info.plistfile insideios/Runner/Info.plist
Add/Edit below Fields in your Info.plist file.
<key>CFBundleURLTypes</key>
.
.
.
.
<array>
<dict>
<key>CFBundleURLSchemes</key>
<array>
<string>fb{your-app-id}</string>
</array>
</dict>
</array>
<key>FacebookAppID</key>
<string>{your-app-id}</string>
<key>FacebookClientToken</key>
<string>CLIENT-TOKEN</string>
<key>FacebookDisplayName</key>
<string>{your-app-name}</string>
<key>LSApplicationQueriesSchemes</key>
<array>
<string>fbapi</string>
<string>fb-messenger-share-api</string>
</array>
Note
If you have implement another providers (Like Google) in your app you should merge values in Info.plist
Check if you already have CFBundleURLTypes or LSApplicationQueriesSchemes keys in your Info.plist. If you have, you should merge their values, instead of adding a duplicate key.
Example with Google and Facebook implemetation:
<key>CFBundleURLTypes</key><array> <dict> <key>CFBundleTypeRole</key> <string>Editor</string> <key>CFBundleURLSchemes</key> <array> <string>fb{your-app-id}</string> <string>com.googleusercontent.apps.{your-app-specific-url}</string> </array> </dict></array>
Still stuck?
Our support team is ready to help you get set up.