

Chatbot Ai Settings
Jump to: Pusher Configuration Settings · Reverb Configuration Settings · Chatbot and Retrieval Settings · OCR & Tiktoken Settings · Video & Sitemap Settings · OpenAI API Settings · General Settings · Embedding Settings · GeoIP & Device Detection Settings
Pusher Configuration Settings
From this page, the admin can configure all Pusher-related settings. These settings ensure real-time communication features—such as instant chatbot responses and live updates—work seamlessly across the platform.
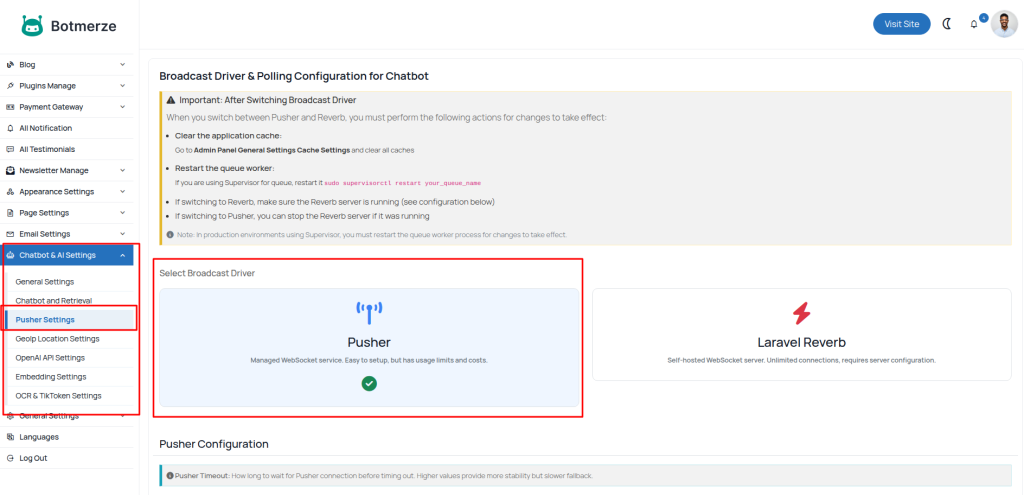 Screenshot
Pusher Configuration Settings page
Reverb Configuration Settings
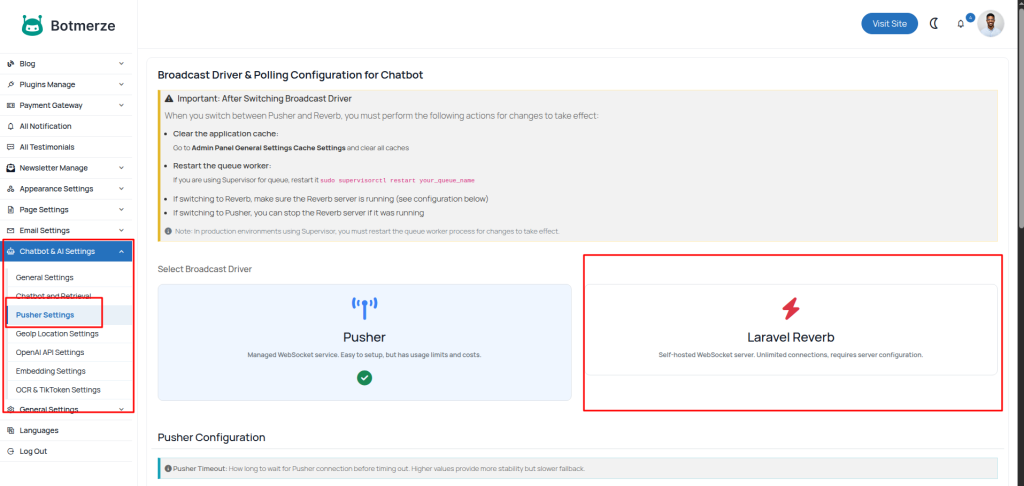
This guide provides detailed, step-by-step instructions for configuring Reverb as your broadcasting driver. Reverb is Laravel's built-in WebSocket server, offering real-time communication without relying on third-party services like Pusher (though Pusher remains an optional alternative).
 Screenshot
Prerequisites:
Ensure your script is installed and running on a Laravel-compatible server. You have administrative access to the application and server. For production, ensure your server supports running background processes (e.g., via Supervisor or systemd). Configuration Steps:
Step 1: Log In as Admin
Open your browser and navigate to the admin login page.
Enter your admin credentials (username/email and password) and click Login.
Step 2: Navigate to Pusher Settings
After logging in, Click Chatbot & AI Settings to access the broadcasting configuration options.
Step 3: Select the Broadcasting Driver
In the pusher settings page, locate the Broadcasting Driver.
Select Reverb from the options available.
Step 4: Fill in the Reverb Settings Fields
Reverb App ID: A unique identifier for your Reverb application. You can generate a random numeric or alphanumeric value (e.g., "290293").
Example App ID: 123456.

Reverb App Key: A public key for client-side authentication. Generate a secure, random string (e.g., "ikbkhfz3Jotfkin4koy"). Use a password generator.
Example App Key: X7k9pLm2nQ8rStUvWxYzXilancerdEfGhIjKlMnOpQr12.

Reverb App Secret: A private key for server-side authentication. Generate a secure, random string (e.g., "fcfn4mtrI33tz0mwaewl").
Example App Secret: PqRsTuVwXyZXilancerDeFgHiJkLmNo12.

Reverb Host: The hostname or IP where the Reverb server runs. Use localhost for local development or your domain (e.g., your-domain.com) for production.

Reverb Port: The port for the Reverb server (default is 8080). Choose an open, unused port.

Reverb Scheme: Use http for local testing or https for secure production environments.
Important Notes on App ID and App Key:

You can generate random values for App ID, App Key, and App Secret as they are user-defined in Reverb. They do not need to be obtained from a third-party service.
Use tools like a password generator or PHP's bin2hex(random_bytes(16)) for secure values.
Ensure the values are unique, secure, and consistent between the admin settings and server configuration to avoid authentication errors.

After filling in the fields, click the Update button to save changes. The .env file will be updated automatically with these settings.
Step 5: Set Up and Start the Reverb Server
Access your server via SSH or hosting control panel.

Navigate to the project root directory (e.g., cd /path/to/botmerze/core/).

Start the Reverb server:
For testing: Run php artisan reverb:start in the terminal (foreground mode).
For production: Use a process manager like Supervisor.
Example config (/etc/supervisor/conf.d/reverb.conf):
[program:reverb]
command=php /path/to/botmerze/core/artisan reverb:start --host=0.0.0.0 --port=8080
directory=/path/to/botmerze/core
autostart=true
autorestart=true
user=www-data
numprocs=1
redirect_stderr=true
stdout_logfile=/path/to/botmerze/storage/logs/reverb.log
Apply changes with sudo supervisorctl reload.
Verify the server is running: Check logs or use telnet localhost 8080 (adjust host/port as needed).
Step 6: Test and Go Live
Return to the app and test the chatbot (e.g., send a message).
If configured correctly, real-time updates will work.Monitor logs (storage/logs/laravel.log and Reverb logs) for errors.
For further assistance, refer to the Laravel Reverb documentation at https://laravel.com/docs/reverb or contact our support.
Chatbot and Retrieval Settings
This page allows the admin to manage settings related to the chatbot’s retrieval and performance. Here, you can configure options such as chatbot enhancement, maximum retrieved knowledge length, session rate limits, and knowledge chunk limits to optimize chatbot efficiency and accuracy.
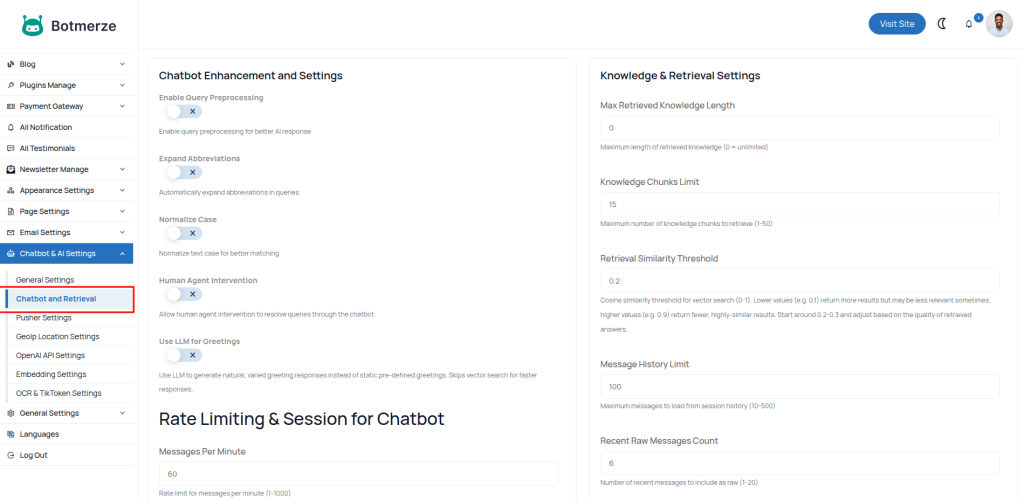 Screenshot
Chatbot and Retrieval Settings Page
OCR & Tiktoken Settings
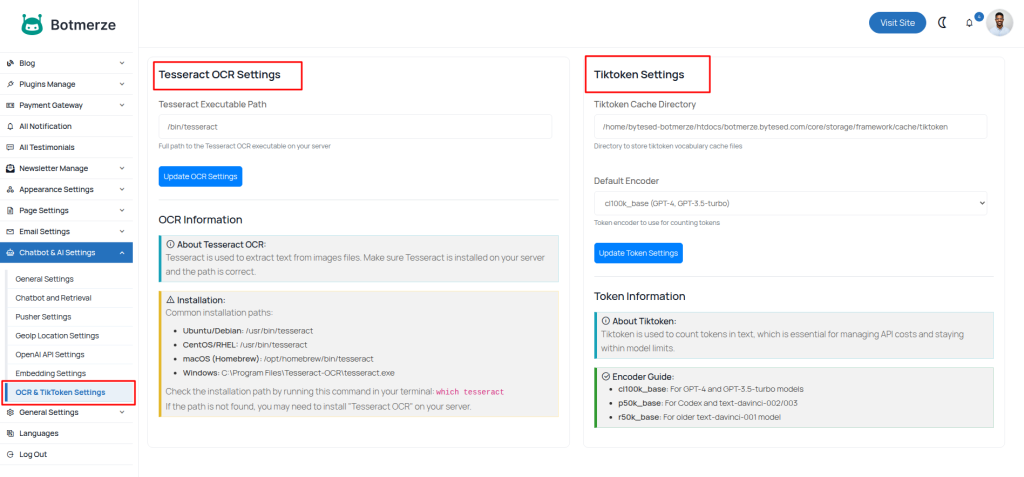
This page allows the admin to configure OCR and TikToken management settings for the AI system:
Tesseract OCR Settings:
-
Executable Path: Set the full path to the Tesseract OCR executable on your server.
-
Purpose: Tesseract extracts text from image files. Ensure it is installed and the path is correct.
-
Installation Guide: Provides common paths for Ubuntu/Debian, CentOS/RHEL, macOS, and Windows.
Tiktoken Settings:
-
Cache Directory: Specify where the tiktoken vocabulary cache files are stored.
-
Default Encoder: Choose the token encoder (e.g.,
cl100k_basefor GPT-4 and GPT-3.5-turbo). -
Purpose: Tiktoken counts tokens in text to manage API costs and stay within model limits.
Admins can update both OCR and Tiktoken settings from this page to optimize AI performance and cost efficiency.
 Screenshot
OCR & Tiktoken Settings Page
Video & Sitemap Settings
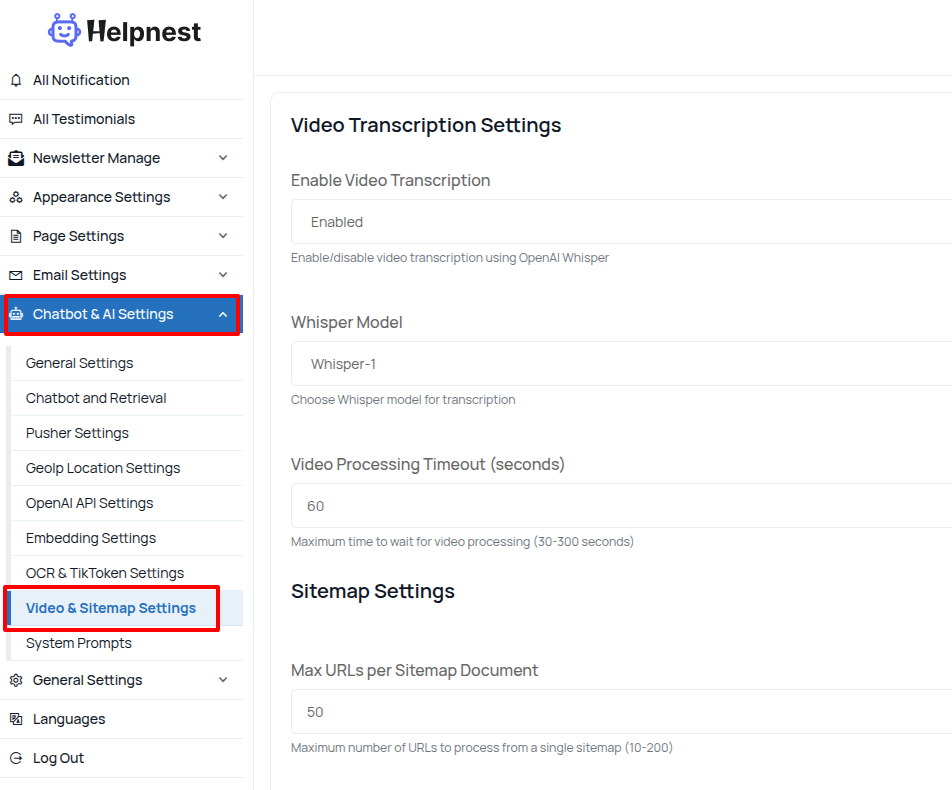 Screenshot
Video & Sitemap Settings
Install yt-dlp to /usr/local/bin/yt-dlp
1. Connect to your VPS
ssh user@your-server-ip
2. Install required dependencies
Make sure curl is installed.
sudo apt update
sudo apt install curl -y
3. Download yt-dlp to /usr/local/bin
sudo curl -L https://github.com/yt-dlp/yt-dlp/releases/latest/download/yt-dlp \
-o /usr/local/bin/yt-dlp
4. Make it executable
sudo chmod a+rx /usr/local/bin/yt-dlp
5. Verify installation
yt-dlp --version
or
/usr/local/bin/yt-dlp --version
Example output:
2026.02.25
Test Download
yt-dlp https://www.youtube.com/watch?v=dQw4w9WgXcQ
Optional (Recommended) Install ffmpeg
sudo apt install ffmpeg -y
Verify:
ffmpeg -version
Update yt-dlp later
sudo yt-dlp -U
Check installation path
which yt-dlp
Expected output:
/usr/local/bin/yt-dlp
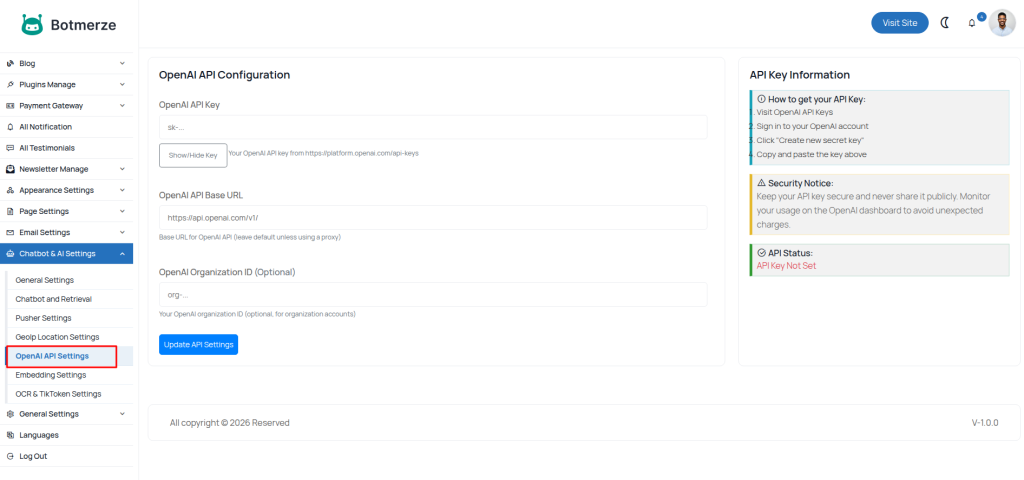
OpenAI API Settings
From this page, the admin can configure the OpenAI API settings.
 Screenshot
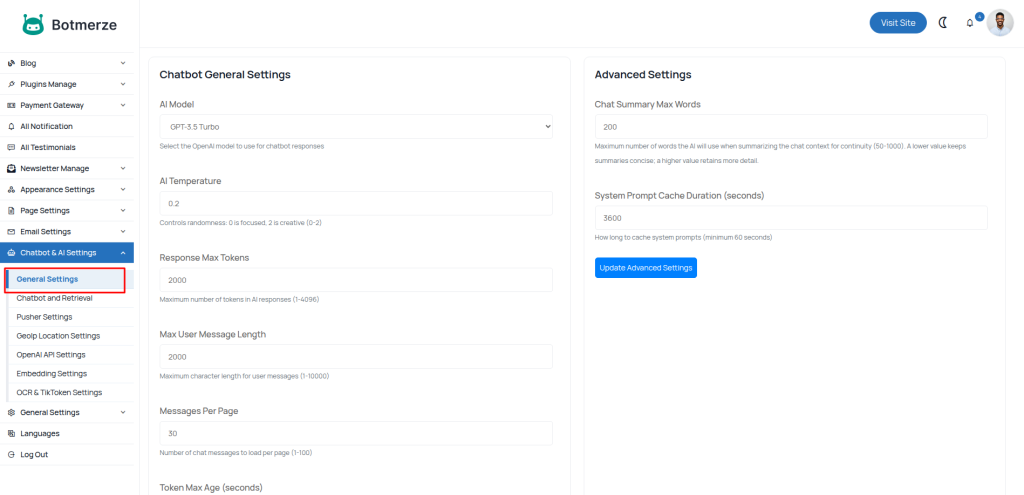
General Settings
This page lets the admin configure key general settings for the Chatbot and AI system. Here, you can manage options like the default AI model, temperature level, system prompt caching, and whether clients are allowed to use their own API keys.
 Screenshot
Chatbot & AI General Settings
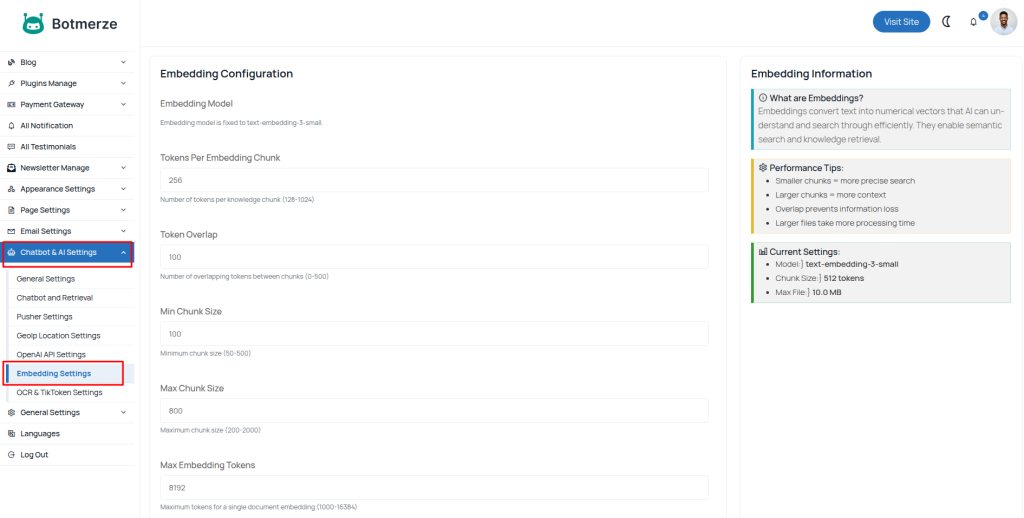
Embedding Settings
This page allows the admin to configure embedding-related settings for the AI system. You can manage options such as:
-
Embedding Model: Fixed to
text-embedding-3-small. -
Tokens Per Embedding Chunk: Number of tokens per knowledge chunk (128–1024).
-
Token Overlap: Overlapping tokens between chunks (0–500).
-
Minimum & Maximum Chunk Size: Define size limits for knowledge chunks.
-
Max Embedding Tokens: Maximum tokens allowed for a single document embedding (1000–16384).
-
Default Knowledge Doc/File Size: Maximum file size for uploaded knowledge files in KB.
These settings ensure efficient knowledge embedding and optimal AI performance.
 Screenshot
GeoIP & Device Detection Settings
This page allows the admin to configure GeoIP location and device detection settings.
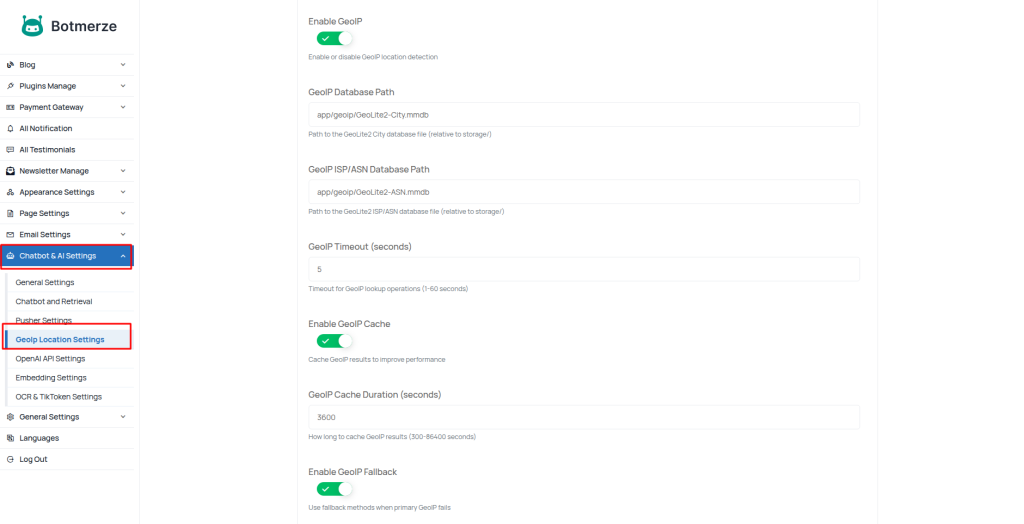 Screenshot
GeoIP & Device Detection Settings Page